Insert object from Excel attachment
These objects retrieve the values from Excel files attached to the document or to a document part. The contributor user can use four types of objects to retrieve the information from the Excel attachments that will be inserted into the document:
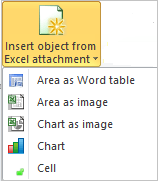
- Area as Word table. Allows inserting an Excel report as Word table
- Area as image. Allows inserting an Excel report as image. This object lets the table behave as a Word image and makes its content not editable but it is possible to: rotate it, expand it and format it as any other Word image
- Chart as image. Allows inserting an Excel chart as image. Like in the case of the Excel areas inserted as images, also the Excel charts can be treated as images
- Chart (only for PowerPoint client). Allows inserting an Excel chart as PowerPoint chart
- Cell. Allows retrieving data from a cell of an Excel file. It is typically used to call the available numbers of a specific cell of an Excel sheet or any non-numerical value contained in a cell such as expressions / texts like “Increase / Decrease” generally available on specific reports
 When you create tables and / or charts in Microsoft Office Excel, a predefined name is automatically assigned to each table / chart using a naming convention that, for example, for the tables is: Table1, Table2 and so on (for the charts: Chart1, Chart2 and so on). The predefined name is assigned by the system according to the installation language of Office, so the user that attaches the file to the document and the user that uses it to update an object whose data source is the attached file, may have different installation languages. In this case the system is not able to update the object since the predefined names do not match and, therefore, it shows the error message "Area not found". Therefore, we recommend that you edit the predefined name and enter a new one before inserting these objects into the document.
No matter how you decide to insert the object (form pop-up menu or from Edit structure ribbon bar), when clicking on the related menu, the system will open the object insertion window (the following image shows the Area as Word table object insertion window).
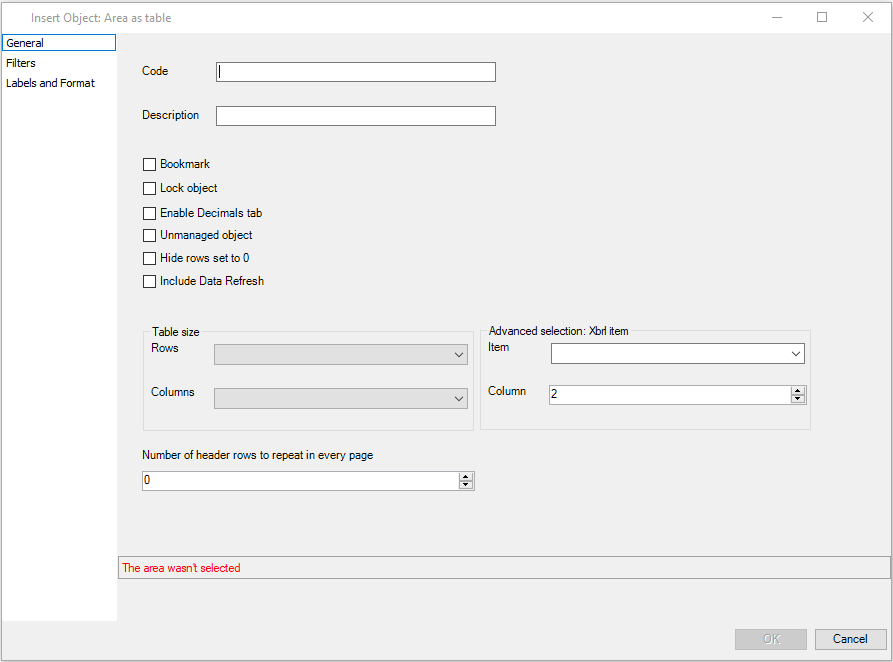
The window is divided into two parts:
- the left part consists of three areas General, Filters and Labels and Format
- in the right part it is possible to define a series of specific options for each area
 The Labels and Format area is available only for the Table and Cell objects windows (divided into two sections).
"General" area
In this area the user has to define:
- Code and Description of the object
- Bookmark. Labels the object as bookmark. This option is very useful when the user wants to use the object in other parts of the document or in another document as "reference", without having to insert it again. This means that if the content of the object changes, also all the other areas of the document referring to that bookmark will change. For further details on how to call a bookmark object, see paragraph "Insert objects from Document part: Reference". This option is not available for "Graph" objects.
- Lock object. When creating an object, only the administrator users can lock it preventing a given contributor user from modifying the object. When this option is selected, if a contributor user tries to modify the object (by deleting it or its attributes), he will not be able to do it and he will see all the object settings field disabled, not editable. When this option is enabled, the system shows an additional field named Object Status, as shown in the image below

- Document. The object is editable or not editable according to the default value defined in the document's properties window (see paragraph “Create new document", Advanced section).
- Locked. The object is locked, meaning that the contributor users can update data but cannot delete the object or modify its values and layout.
- Not locked. The object can be modified and deleted.
- Footnote (only for Cell objects type).It allows identifying the object as a note that can be related to other objects (only for XBRL purposes)
- Enable Decimals tab (only for Table objects type). Enhances the alignment of the numbers contained in a table object. For example, let us assume that a same table contains both positive numbers and negative numbers and that the negative numbers are displayed between brackets. By default, the system will display the bracket of the negative number as first digit of the number, causing a bad alignment, as shown in the image below:

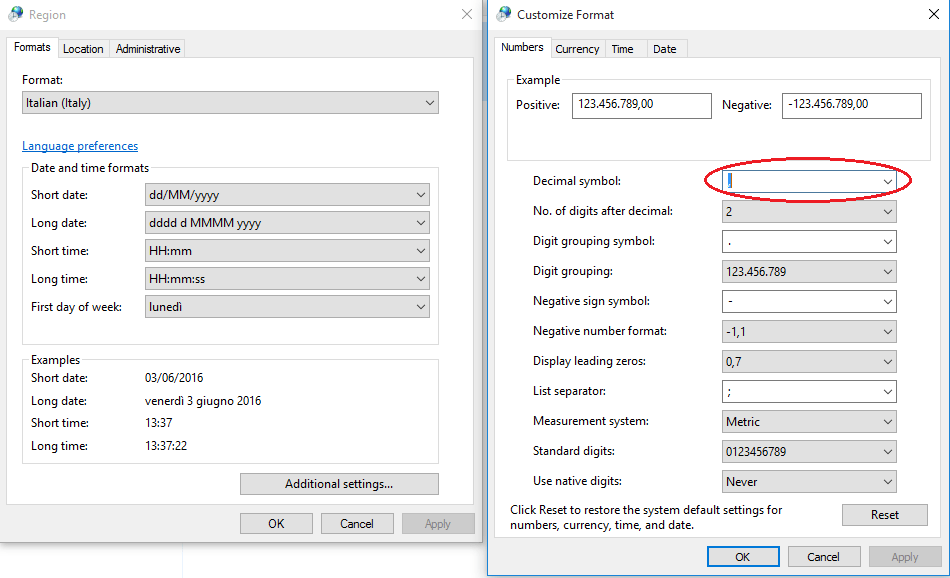
To solve this problem, it is necessary to enable the "Enable Decimals tab" option that enables the alignment of the numbers in relation to the character used as decimal separator, in our case the comma:

- Unmanaged object (only for Table objects type). The table object is inserted into the document as Word table and, when updating, the information about format, cell layout, etc. are not managed. This option is useful, for example, when you insert a very big table object that does not fit the page. When this option is selected, the system divides the table into several pages by showing the headers and treating the table as a standard word table not used for any specific function
- Hide rows set to 0 (only for Table objects type). Allows hiding the rows of the table set to zero in all cells of numeric, currency and percentage type. The rows you want to exclude from this setting can be specified in the Labels and Format area.
In case of vertical joined cells the option is NOT supported!
- Include Data Refresh. It updates the object in order to retrieve any information inserted when defining its structure. If this option is not selected, the system will just create a tag for the object (blue box showing that the object has been inserted) and then it will be necessary to update the object to retrieve its value
- Keep the style of the source (only for Power Point client and only for Table and Chart objects). For the table objects whose data source is Excel, the system keeps the original style; specifically, the styles in terms of "Cell format" the system can keep are:
- Alignment: Alignment of the "Horizontal and Vertical" text and Orientation (+90, 0, -90)
- Character type: Style (Italic and Bold), Size, Underline and Color
- Border: Style, Color, Predefined and Customized
- Background color
For the Chart objects, the system keeps the style that is applied to the chart on Excel and does not apply the style defined on the document.
- Table size (only for Table objects type). Allows you to apply the styles defined in the "Table size" utility, available on the Tagetik ribbon bar, to the Rows and Columns of the table
- Dynamic selection: Xbrl item (only for Table objects type). Only for the XBRL purposes.
"Filters" area
In this area the user has to:
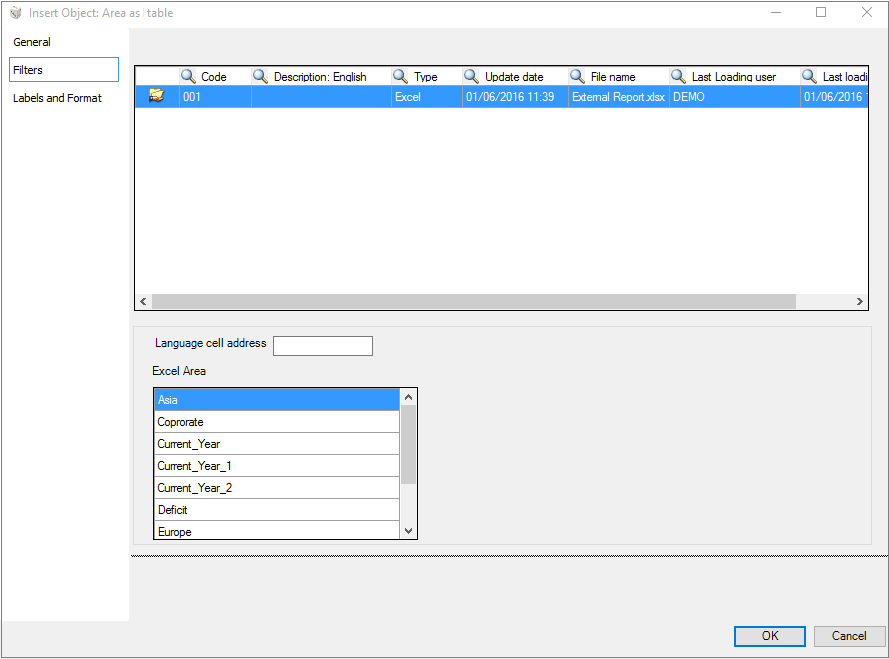
- select the source attachment from the list
- enter in the Language cell address field the letter of the column and the number of the row of the Excel file (e.g. A1) containing the formula that allows filtering the information of the Excel area according to the language set on the document
- select from the Excel Area menu the name of the area defined in the Excel file containing the range of values to display (the range of the attachment you want to display must belong to an Excel area)
- select the OK button to go back to the open document and display the object whether you have chosen to update the field concurrently with the operation
In the case of a "Cell" object type in the "Filters" area window, in addition to the fields described before, it is necessary to specify the source cell by using:
- an absolute reference by selecting Address and specifying the name of the sheet "Sheet" (e.g. Sheet 1) and the coordinates of the cell "Cell" (e.g. A1), or
- a relative reference by selecting Search and then choosing one of the following search modes:
- by Offset. This function is similar to the “VLOOKUP” function of Excel. After selecting the Excel Area from the drop-down menu (this area must be defined in advance on the file) and defining the description of the Value in the first columns of the Excel file (typically the name of a FST item whose value is to be retrieved), the system searches for it in the area of the specified source file and returns the value of the same row on the right "X" column, where “X” is the number specified in the "Offset" menu
- by Column.As in the vase of the search by Offset, the user must insert the description of the "Value" to search in the first column of the Excel area. For the columns, the user must select the name of the column corresponding to the value to insert. The system combines the search ros / column and extracts the value without the need to know the exact position
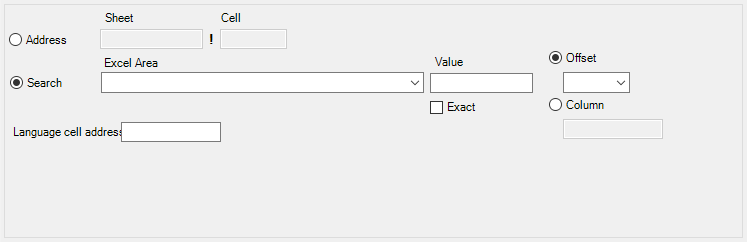
By the Search function it is possible to search for the exact content of the text specified in the Value field by enabling the Exact option. When this option is disabled, the system extracts the value of the first cell that in the Excel Area includes the content of the Value field and not the exact one.
Example:
| Tangible assets | 946 |
| Intangible assets | 137 |
If you search the word “Tangible assets” without enabling the Exact option, the result will be 946, because the system will find the value contained in the text of the first row: “Intangible assets”. On the contrary, if you enable the Exact option, the result will be 137 because the system will search for the exact value “Tangible assets” within the text
Cell
In case of "Cell" objects, besides the fields described above, in the "Filters" area it is necessary to define also the source cell by using:
- an absolute reference by selecting Address and using the name of the "Sheet" sheet (e.g. Sheet 1) and the coordinates of the "Cell" cell (e.g. A1), or
- a relative reference by selecting Search and then choosing on of the following search options:
- by Offset. This function is similar to the “VLOOKUP” function of Excel. After selecting the Excel Area from the drop down menu (obviously, this area must be previously defined on the file) and inserting the description of the Value to load in the first column of the excel file (typically the name of an fst item whose value needs to be retrieved), the system searches it in the area of the specified source file and generates the value of the same row on the "X" right column, where "X" is the number specified in the "Offset" menu
- by Column.As in the case of the search by Offset, the user must insert the description of the "Value" to be searched in the first column of the Excel area. For the columns, the user must select the name of the column corresponding to the value to insert. The system merges the row / columns search and retrieves the value, with no need to know its exact position
The Search function allows searching for the exact content of the text specified in the Value field by enabling the Exact option. If this option is disabled, the system retrieves the value of the first cell that in the Excel Area includes the content of the Value field and not the exact one.
The following table shows an example:
| Tangible assets | 946 |
| Intangible assets | 137 |
If you search for the word "Tangible assets" without enabling the Exact option, the result will be 946, because the system finds the value contained in the text of the first row: “Intangible assets”. On the contrary, when the Exact option is enabled, the result will be 137, for the system finds the exact value “Tangible assets” within the text.
"Labels and Format" area
This area is used to manage the labelling of the objects for the XBRL purposes and for the Diagnostic, as shown in the image below.
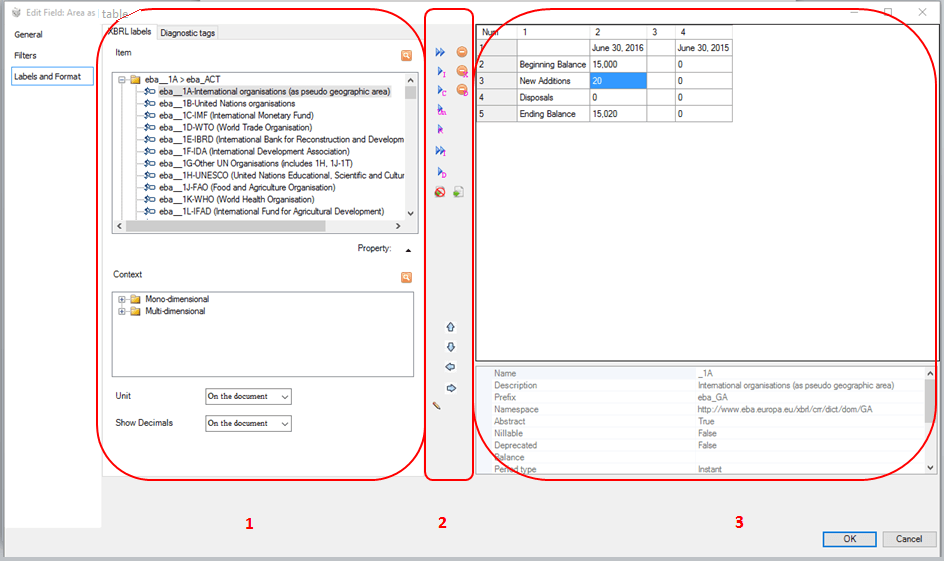
Four different areas can be highlighted in this window:
- (1) - Elements area - area containing all the available elements to define the settings, specifically:
- XBRL labels (only for Word client): allows you to label the Items, the Contexts, the Units and the Decimals on the object of the document displayed on the right hand side of the window
- diagnostic tags: allows you to tag the labels of the diagnostic defined when creating the diagnostic rules, to the objects of the documents displayed on the right hand side of the window (for further details about the tagging of the diagnostic objects, consult the section about the creation of the labels and of the diagnostic rules of this manual)
No matter if you want to label or tag an object, the parametrization is set by moving a set of elements from a place (elements area) to another (definition area) - (2) - Buttons area- buttons area for the management of the elements (for further details about the meaning and the usage of the buttons, see chapter Label) - (3) - Definition area) - definition area showing: - at the top the object inserted into the document (when inserting the object, no table is displayed as the object is empty) - at the bottom some information about the selected cell
Option: Always visible
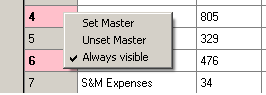
By placing the cursor over the indicator of each row in the definition area, it is possible to enable /disable the overridden visualization of the row by using the pop-up menu (right button of the mouse). If this option is enabled, the system will display the row even when the Hide rows set to 0 option is enabled and the row could be hidden because of its characteristics.
When this option ("Always visible") is enabled, the color of the row area will change (Bold text on pink background).
Cell format
Basing on a set of parameters, it is possible to format data read from Excel. The formatting of the cell can be accessed by using the Format button  , if the cell belongs to an "Area as Word table" object type, or by accessing the Format area, in the case of a "Cell" object. In both cases, the format management window includes some formatting options, as shown in the image below.
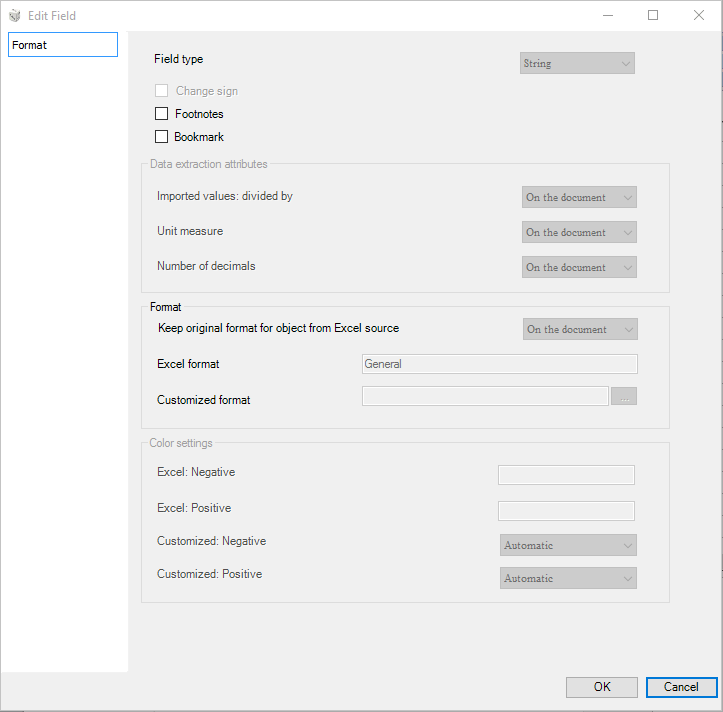
- Field type. Shows the format type of the Excel cell. Please note that the validation rules consider only the cell formatted as numeric (e.g. field type = N). This is exclusively a system field
- Change sign. Allows the usage of the opposite sign
- Footnote. Allows identifying this cell as a note (only for XBRL purposes)
- Bookmark. Labels the cell as bookmark in order to reuse it as "reference" in other parts of the document or in another document. The cell's code and description are assigned by the system when saving the object, but the user can also define another description by editing the relevant field on the right side of the flag.
Data extraction attributes
- Imported values: divided by. -defines the division factor for each number imported from a data source. For example, a document with this field set to "3" will show the amount “10,000” as “10”. If the scaling is not required in the document, this value should be 1. The On the document option indicates that this field inherits the setting defined at "Document properties" level
- Unit measure. Unit of measurement (in terms of millions, thousands, etc.) to consider for the numbers imported from the data source and resized according to the selected division factor. This field is used only for the XBRL and doesn't affect the numbers but is only informative. The On the document option indicates that this field inherits the setting defined at "Document properties" level
- Number of decimals. This information is not used for the display of the decimal numbers but concerns only the accuracy with which the number is saved into the database:
- Precise. Specifies the number of decimals of the value that will be saved into the database. It is used to specify how many decimals must be considered during a given data processing, such as the “Diagnostic” and / or the XBRL, and doesn't affect the numbers but is only informative
- On Format. In this case the precision will be defined according to the number of decimals available in the format. For example, if the number has 2 decimals, also the precision will be set to 2
- On the document. Indicates that this field inherits the setting defined at "Document properties" level
Format
- Keep original format for object from Excel source. Allows you to choose whether to keep or not the original format of the cell by inheriting it from the source file without the need to apply any formatting. The On the document option indicates that this field inherits the setting defined at "Document properties" level. In the case of String cells, the system can keep the superscript and subscript of the read value
- Excel format. Shows the Excel format currently used for the cell
- Customized format. Allows you to define the format to apply whether the "Keep original format for object from Excel source" option is set to "No"
Any Conditional Formatting present in the Excel table will be applied when a new table object is added into the document part (both from form or attachment). Here below the list of conditional formatting supported (the conditionals formatting not clearly listed here are not supported):
- Highlight cells rules (Greater than,…, less than)
- Top/Bottom rules (Top 10 items,…., Bottom 10%)
- Color Scales
Some cell format (i.e. Number, Alignment, Character, etc.) defined in the conditional formatting rule may not be supported during the Word object update. As regard the border thickness, using the Mapping borders functionality available in the advanced document configuration.
Color settings (only for the tables' cells )
Allows you to choose the colour of some specific values (Negative number, Positive number, etc) contained in the cells of the object inserted in the Word document. Only if the Keep original format for object from Excel source option is set to No.