Insert free objects
There are three objects that can be used to insert information not from a data source. Such information can be used by specific data processing such as the diagnostic and / or the XBRL. In all other cases, the information can be inserted into the document just by using the standard utilities of Microsoft Office.
To insert a free object, it is necessary to place the cursor over the area of the document in which you want to insert the object and then use the "Tagetik" pop-up menu, or the "Insert object from Tagetik" menu accessible from the Edit Structure ribbon bar by following the path Data > Insert free objects.
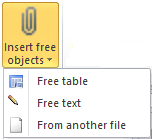
The free objects you can insert are the following:
Free table
This function allows you to create a table as Tagetik object rather than directly on the document's page. The advantage of inserting a table as Tagetik object is that you can leverage the Tagetik's specific utilities. Another advantage is the XBRL and the Edgarization of the object; indeed, for some parts of the object, it will be possible to set the format and the XBRL tags. .
By clicking on the "Insert Object: Free text table" menu, the system opens the insert object window, as shown in the image below.
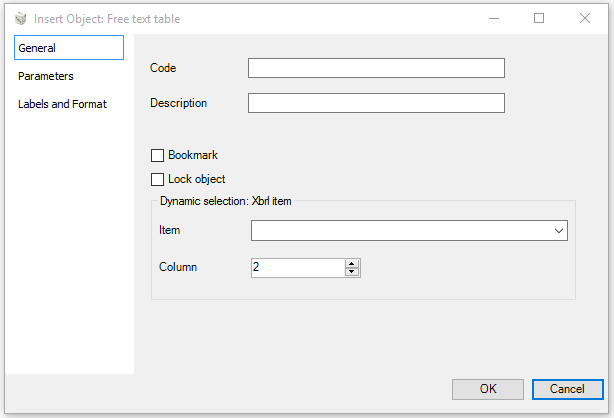
The window displays:
- three areas on the left: General, Parameters and Labels and Format
- some specific options for each area on the right
"General" area
In this area the user must define:
- Code and Description of the object
- Bookmark. Labels the object as bookmark. This option is very useful when the user wants to use the object in other parts of the document or in another document as "reference", without having to insert it again. This means that if the content of the object changes, also all the other areas of the document referring to that bookmark will change. For further details on how to call a bookmark object, see paragraph "Insert objects from Document part: Reference".
- Lock object. Only the administrator users can lock an object preventing the contributor users from modifying the object. When this option is selected, if a contributor user tries to modify the object (by deleting it or its attributes), he will not be able to do it and he will see all the object settings fields disabled, not editable. When this option is enabled, the system shows an additional field named Object State, as shown in the image below

- Document. The object is editable or not editable according to the default value defined in the document's properties window (see paragraph “Create new document", Advanced section).
- Locked. The object is locked, meaning that the contributor users can update data but cannot delete the object or modify its values and layout.
- Not locked. The object can be modified and deleted.
- Dynamic selection: Xbrl item. Allows setting a tuple item type and the column number to which the XBRL labelling must be applied
"Parameters" area
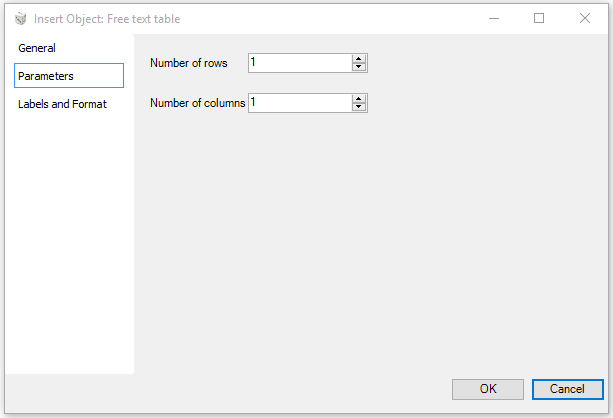
In this area it is possible to define the number or rows and columns of the table, as shown in the image below.
"Labels and Format" area
This area is used to manage the tagging of the objects for the XBRL and DIagnostic purposes, as shown in the image below.
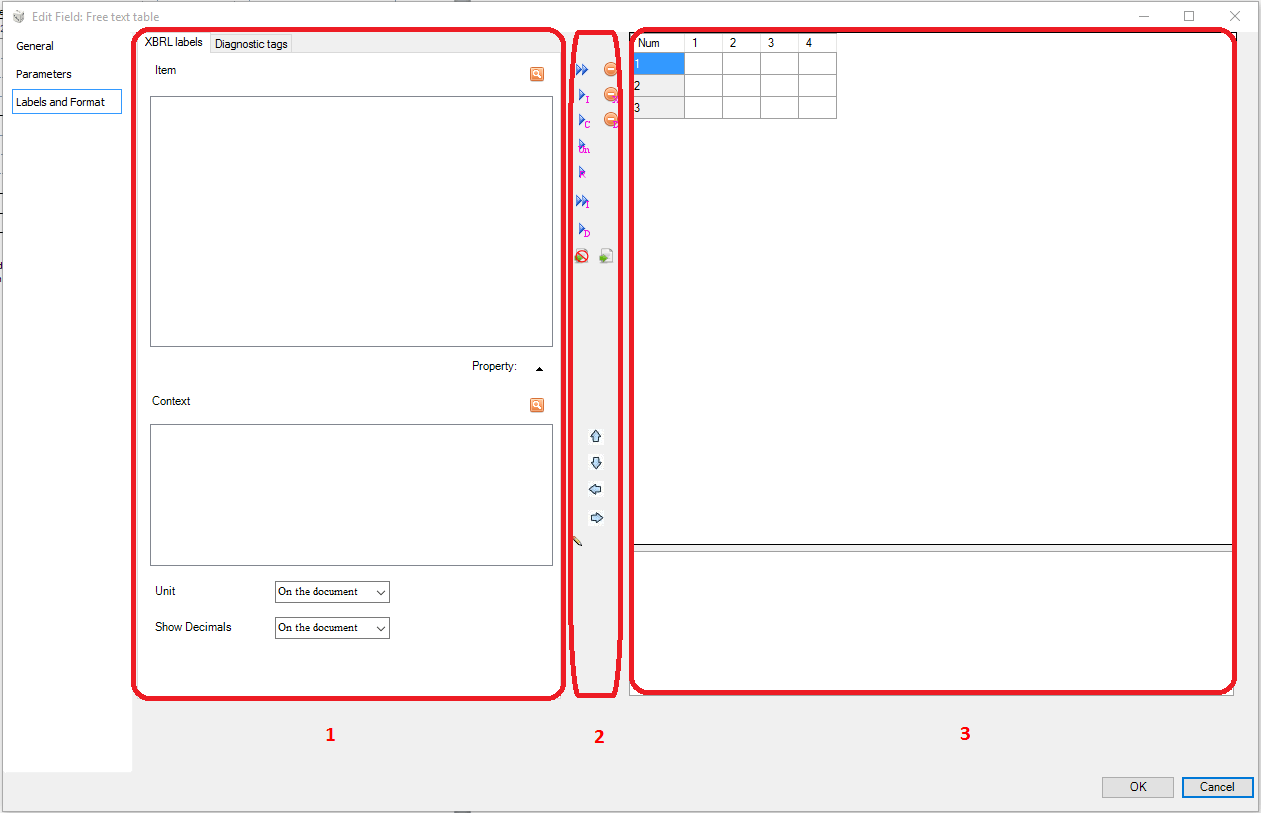
This window is made up of three different areas:
- (1) - Elements area. area containing all the available elements to define the settings, specifically:
- XBRL labels: allows you to label the Items, the Contexts, the Units and the Decimals to the cell highlighted in the definition area
- diagnostic tags: allows you to tag the labels of the diagnostic defined when creating the diagnostic rules, to the cell highlighted in the definition area (for further details about the tagging of the diagnostic objects, consult the section about the creation of the labels and of the diagnostic rules of this manual)
No matter if you want to label or tag a object, the parametrization is set by moving a set of elements from a place (elements area) to another (definition area) - (2) - Buttons area- buttons area for the management of the elements - (3) - Definition area) - definition area showing: - at the top the object inserted into the document (when inserting the object, no table is displayed as the object is empty) - at the bottom some information about the selected cell
For further details about the meaning and the usage of the buttons, see paragraph Label.
Cell format
According to a set of parameters, it is possible to format data of the table's cells. The cell format can be accessed by using the Format  button. The format management window contains some format options, as shown in the following image.
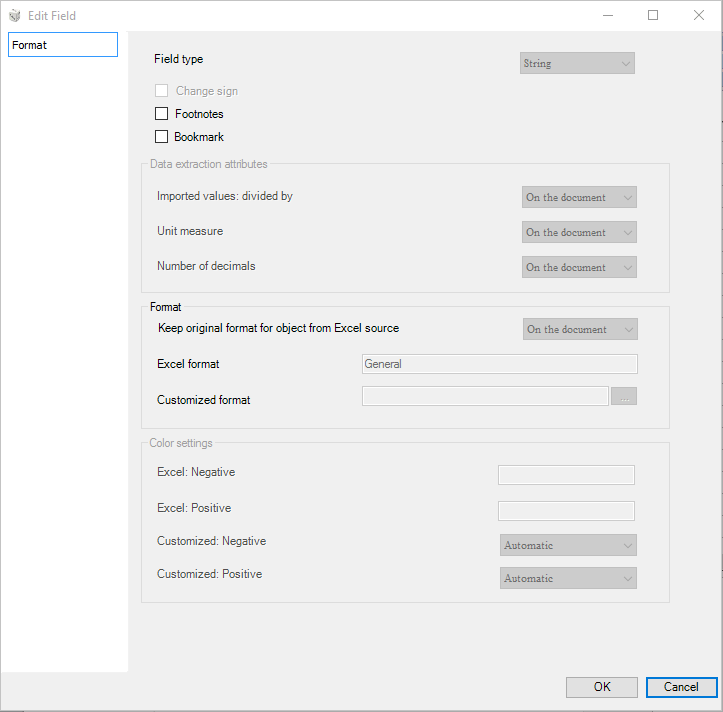
- Field type. Shows the format type of the Excel cell. Remember that the validation rules consider only the cell formatted as numeric (e.g. field type = N). this is only a system field
- Change sign. Allows using the opposite sign
- Footnote. Allows identifying the cell as a note (only for the XBRL purposes)
- Bookmark.Labels the cell as bookmark
Free text
This function allows inserting a text/number as Tagteik object, rather than directly on the document's page. The advantage of inserting the text / number as Tagetik object is that you can leverage the specific functions of Tagetik.
For example, let us assume that we add a text in the paragraph at "page 4" and that we want to reuse it at "page 25"; for this purpose, we need to use the "Bookmark" and "Reference" functions that, as explained in the previous chapters, are available only for the Tagetik objects.
Therefore, in order to let the system know that a specific text somehow belongs to Tagetik, it is necessary to add such elements into the field defined in the document as Free text.
Another advantage is the XBRL and the Edgarization of the object; indeed, for some parts of the object, it will be possible to set the format and the XBRL tags.
Moreover, in a free text it is possible to leverage the 100% of the client functions and, if necessary, you can insert not only the text but any other Tagetik object previously described (object within the object).
By clicking on the "Insert Object: Free text" menu, the system opens the insert object window, as shown in the image below.
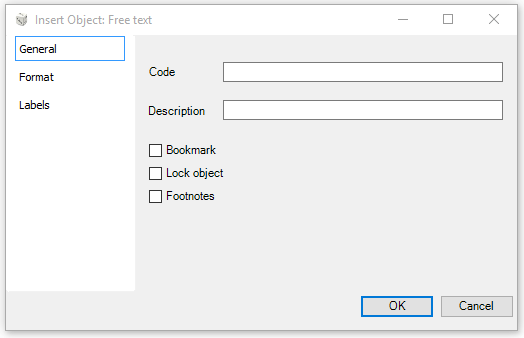
The window displays:
- three areas on the left: General, Parameters and Labels and Format
- some specific options for each area on the right
"General" area
In this area the user has to define:
- Code and Description of the object
- Bookmark. Labels the object as bookmark. This option is very useful when the user wants to use the object in other parts of the document or in another document as "reference", without having to insert it again. This means that if the content of the object changes, also all the other areas of the document referring to that bookmark will change. For further details on how to call a bookmark object, see paragraph "Insert objects from Document part: Reference".
- Lock object. Only the administrator users can lock an object preventing a given contributor user from modifying the object. When this option is selected, if a contributor user tries to modify the object (by deleting it or its attributes), he will not be able to do it and he will see all the object settings field disabled, not editable. When this option is enabled, the system shows an additional field named Object Status, as shown in the image below
- Document. The object is editable or not editable according to the default value defined in the document's properties window (see paragraph “Create new document", Advanced section).
- Locked. The object is locked, meaning that the contributor users can update data but cannot delete the object or modify its values and layout.
- Not locked. The object can be modified and deleted.
- Footnote. Allows identifying the object as a note that can be related to other objects only for XBRL purposes
"Format" area
In this area it is possible to select different types of field, as shown in the image below
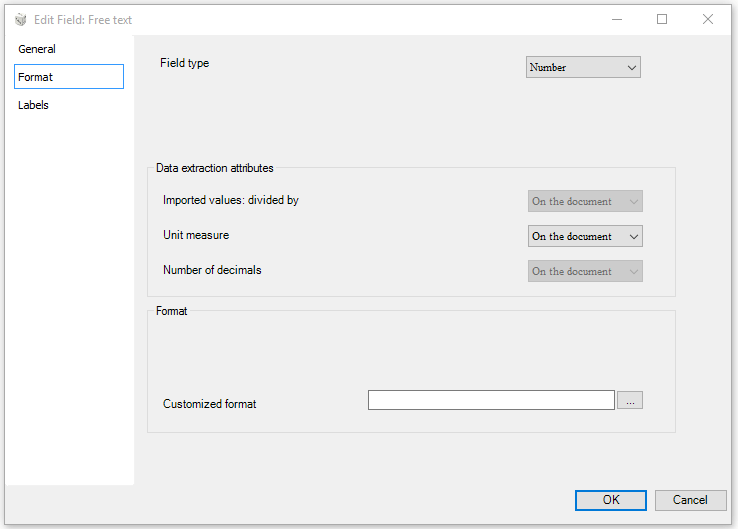
In this window, if you select as Field type:
- the Text or String value, it means that the content of this object is textual and it is not possible to set customized formats. The difference between the Text and the String is the ability to contain other objects (object within the object)
- any other value (Number, Currency, Percentage, etc), it is possible to define a specific format in the Customized format window accessible by clicking on the button

 The Unit of measure and the Number of decimals can be chosen, respectively, only for the Number/Currency and Percentage fields.
"Labels" area
This area is used to manage the tagging of the objects for the XBRL and Diagnostic purposes, as shown in the image below.
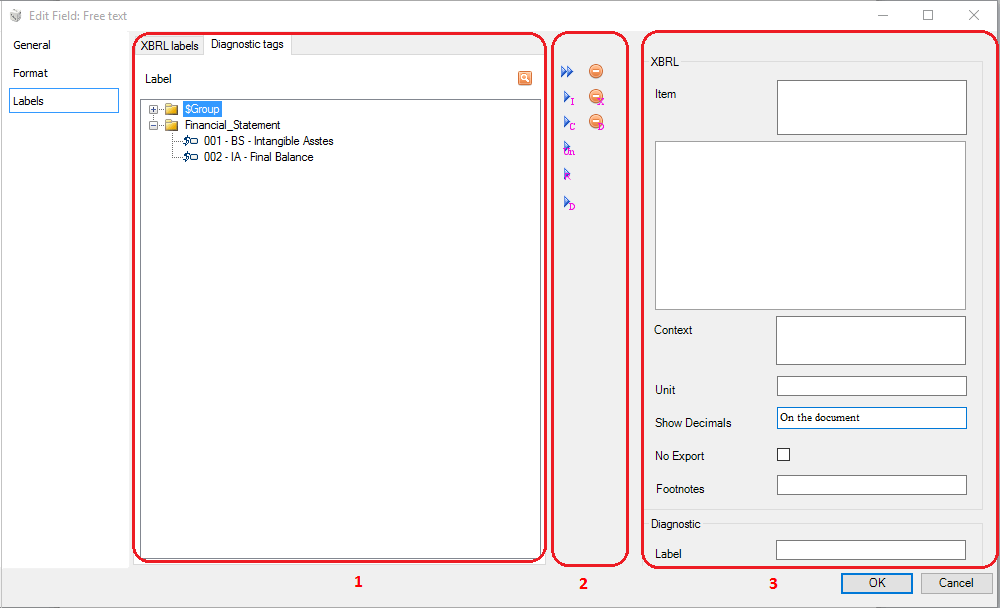
Three different areas can be highlighted in this window:
- (1) - Elements area - area containing all the available elements to define the settings, specifically:
- XBRL labels (only for Word client): allows you to label the Items, the Contexts, the Units and the Decimals on the object of the document displayed on the right hand side of the window
- diagnostic tags: allows you to tag the labels of the diagnostic defined when creating the diagnostic rules, to the objects of the documents displayed on the right hand side of the window (for further details about the tagging of the diagnostic objects, consult the section about the creation of the labels and of the diagnostic rules of this manual)
No matter if you want to label or tag a object, the parametrization is set by moving a set of elements from a place (elements area) to another (definition area) - (2) - Buttons area- buttons area for the management of the elements - (3) - Definition area) - definition area showing: - at the top the object inserted into the Document (when inserting the object, no table is displayed as the object is empty) - at the bottom some information about the selected cell
For further details about the meaning and the use of the buttons, see paragraph Label.
From another file (only for Word Client)
This function allows inserting directly into the document's page the content of a file (Excel, Word,Text, Image and PDF) attached to a document part. When you insert the content of a pdf file, the system will insert only the first page of the file. Once inserted in the Word page, the object can no longer be modified.
When you click the "Insert Object: Attachment" menu, the system opens the insert object window, as shown in the image below.
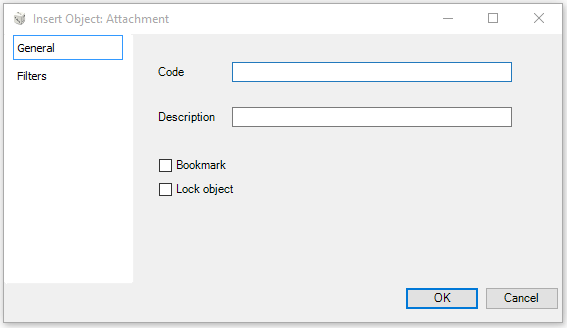
The window displays:
- on the left side, two areas: General and Filters
- on the right side, some specific options for each area
"General" area
- Code and Description of the object
- Bookmark. Labels the object as bookmark. This option is very useful when the user wants to use the object in other parts of the document or in another document as "reference", without having to insert it again. This means that if the content of the object changes, also all the other areas of the document referring to that bookmark will change. For further details on how to call a bookmark object, see paragraph "Insert objects from Document part: Reference".
- Lock object. Only the administrator users can lock an object preventing a given contributor user from modifying the object. When this option is selected, if a contributor user tries to modify the object (by deleting it or its attributes), he will not be able to do it and he will see all the object settings field disabled, not editable. When this option is enabled, the system shows an additional field named Object State, as shown in the image below
- Document. The object is editable or not editable according to the default value defined in the document's properties window (see paragraph “Create new document", Advanced section).
- Locked. The object is locked, meaning that the contributor users can update data but cannot delete the object or modify its values and layout.
- Not locked. The object can be modified and deleted.
"Filters" area
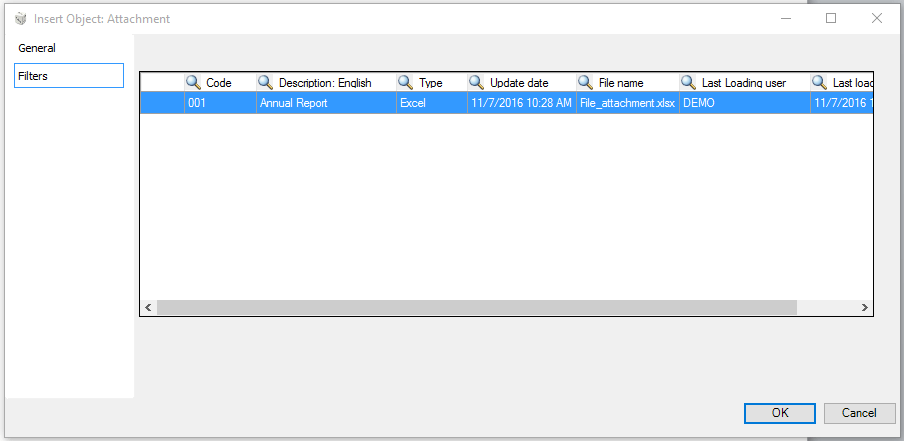
In this area it is necessary to select the file whose content has to be inserted into the Word page. After selecting the file, click on the OK button to insert the content in the point of the document's page where the cursor of the mouse is positioned.