Create a new document
When creating a new document as well as when copying from an existing document, you are creating the actual document on which all contributor users will work according to their user rights. By clicking on New documentyou access the document creation window in which the following parameters have to be defined:
- Code and Description
- Document language
- Deadline
- Document's dimensions (entity, scenario, etc.)
- Task flowchart type to use
- Data extraction attributes
- Document formatting
This characteristics are defined in a window like the one shown below:
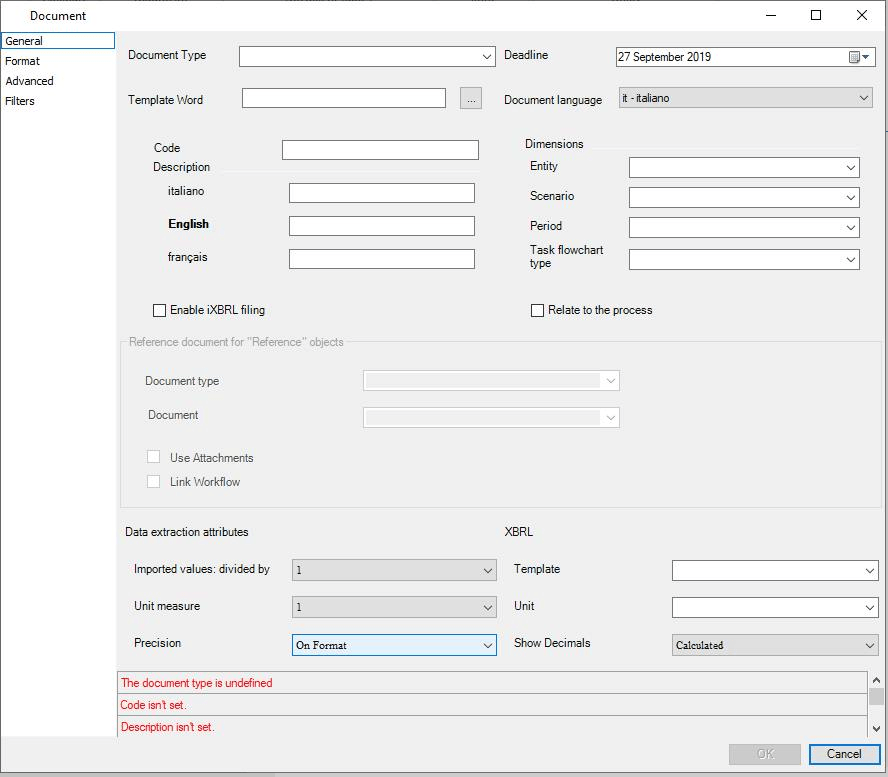
The window includes:
- four areas on the left hand side: General, Format, Advanced and Filters
- a set of specific options for each area on the right hand side
General Area
In the General area it is possible to define the basic information for the document you want to create. In this section, it is possible to identify some main areas, as shown in the image below.
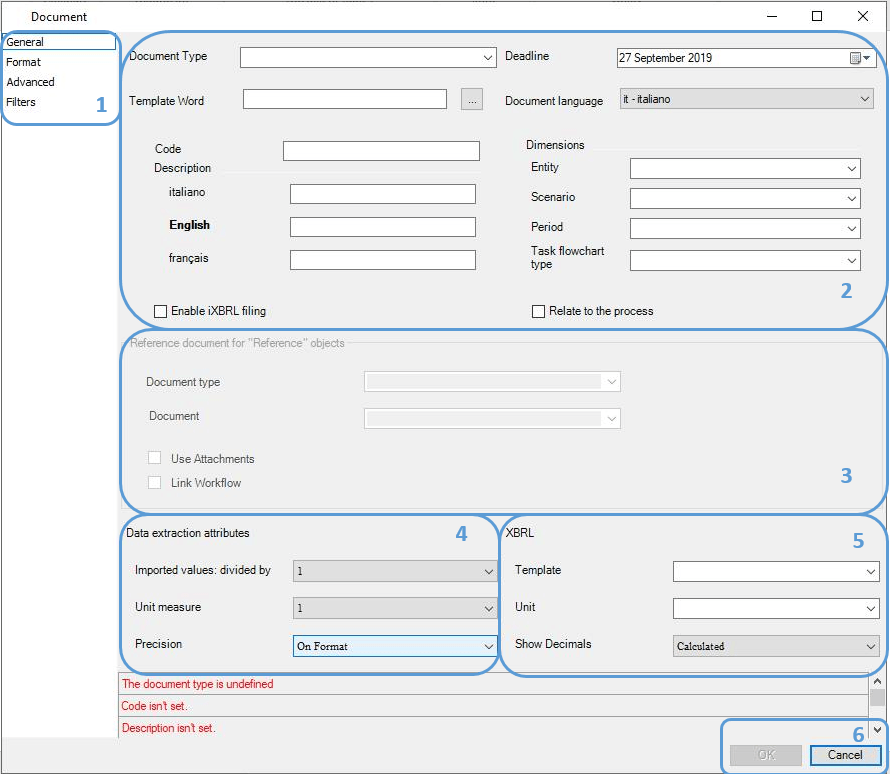
In particular, it is possible to highlight six areas:
- (1) - area containing the list of available sections for this window
- (2) - document's properties definition area
- (3) - area for the management of the reference document
- (4) - data extraction mode definition area
- (5) - XBRL information management area
- (6) - contains the following buttons:
- OK: closes the setting window and saves any modification made
- Cancel: closes the window without saving the modifications made to the parametrization.
Let us examine some of them in more detail:
(2) - Document's properties definition
In this area it is possible to define some characteristics of the document, such as:
- Document Type. Document type from which all information defined in the web interface of the admin user is inherited (chapters, sections, paragraphs and task flowchart)
- Code. ID code of the document
- Description. Document's description
- Deadline Date by which the document must be completed (it must be later than the document creation date). This date is used to calculate the intermediate deadlines by which each document activity must be completed
- Document language. The language in which the description of the objects of the document is displayed
-
Dimensions. Entity, Scenario and Period used as default values that apply to all objects of the document
-
Task flowchart type. Task type to apply for the Document. This is a mandatory information if the option is enabled in the document type definition window
- Template Word o PowerPoint. Template related to the document. Relating a template to the document means relating all the styles defined in the template to all the document activities available in the document, without having to create again or copying the styles in each part (the template is inherited also after the roll forward of the document). A template can be related only when creating the document and not when modifying it.
- Relate to the process. Indicates that the document can be related to a Tagetik process. If the Document type, the document language, the Entity, the Scenario and Period are the same, it is possible to relate only one document to the same process
(3) - Reference document for "Reference" objects
In this area it is possible to define a reference document for the current document in order to retrieve the reference information from the source document by using the objects.
- Document type. Reference document type
- Document. Reference document
- Use Attachments. Enables the use of the reference document's attachments
- Link Workflow. Allows linking the task flowcharts of the reference document
(4) - Data extraction attributes
In this area it is possible to define how to read data from a data source.
- Imported values: divided by. Division factor applied to the values imported from a data source. For example, a document with "Imported values: divided by" set to "3" will show an imported value of "10.000" as "10"
- Unit measure. Unit of measure (millions, thousands, etc.) for the values imported from the data source and then redefined according to the selected division factor. This field is used only for the purposes of the XBRL and does not affect the numbers themselves, but it has an information value only.
- Precision. Number of decimals with which the values must be saved on the database. This information specifies how many decimals must be considered during a given data processing (Diagnostic and / or XBRL) and not for the display of the value within the document. Possible values:
- a value between 0 and 15
- On Format (predefined setting): in this case, the precision depends on the number of decimals available in the format
 The data extraction mode can be overridden also at single object level.
(5) - XBRL information management (only for Word client)
In this area it is possible to manage some XBRL information. For example, you can:
- Template: associate an XBRL template in order to use a different taxonomy and different contexts during the tagging activity
- Unit: choose the unit of measure for the "monetary" items
- Show Decimals: choose the number of decimals to display. Possible values:
- a value between -20 and +20
- Exact: in this case, the number of decimals displayed is the same as that set for the document
- calculated: in this case, the number of decimals displayed will be calculated on the basis of the "Unit measure" and "Precision" values of the document. For example, if the Unit of measure set on the document is 6 Millions and the Precision is 1, then the data read from the data source 1.500.000 will be shown in the document as 1,5.
Format Area
When clicking on Format, the system displays a new window for the definition of the formats the system will apply to the objects defined in the document.
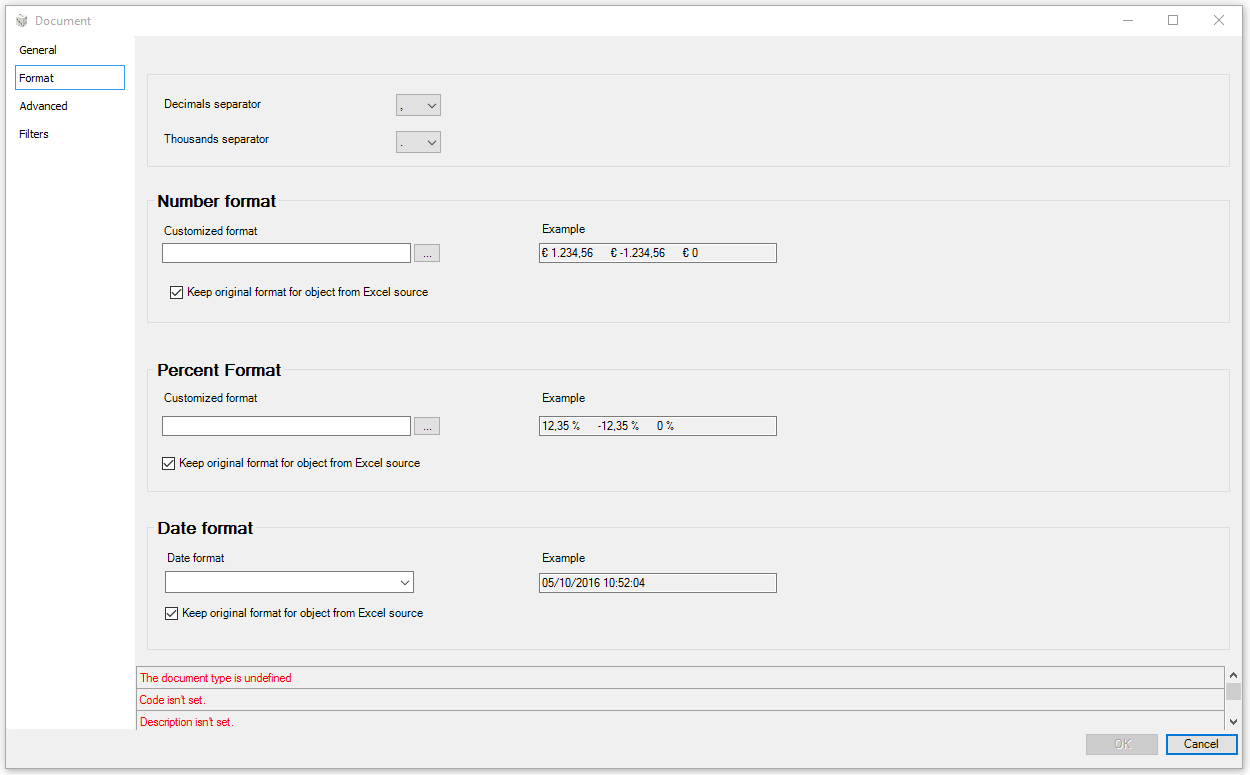
In this area the users can decide how to:
- display the Decimals separator and the Thousands separator, by selecting one of the available options after clicking on the button
 . For example, if the user decides that the numbers must display two decimals and the comma is the thousands separator, then all number objects are displayed on the document in the following format "1,000.00"
 - format the numbers, the dates and the percentages, choosing between:
- Customized format.For the number and percentage objects, after clicking on the button , it is possible to define the format to apply. The format of the objects of date type can be chosen among those available in the drop down menu. Once defined, the format is displayed in the "Customized format"/ "Date format" rows and the "Example" rows show how the objects will be formatted in the document.
- Keep original format for object from Excel source. For all objects whose data source is Excel, the system keeps the original format.
In order to use as much as possible the format of the data source's files and facilitate the formatting / XBRL filing of data, it is necessary to configure in the "General - Data extraction" and "Format" sections the following parameters as shown below:
- Precision set to "On format"
- Show Decimals set to "Calculated"
- format set to "Keep original format for object from Excel source"
 These properties apply only if a new object is inserted and not when updating an existing object.
Advanced Area
By clicking on the Advanced Area, it is possible to configure the document's advanced settings.
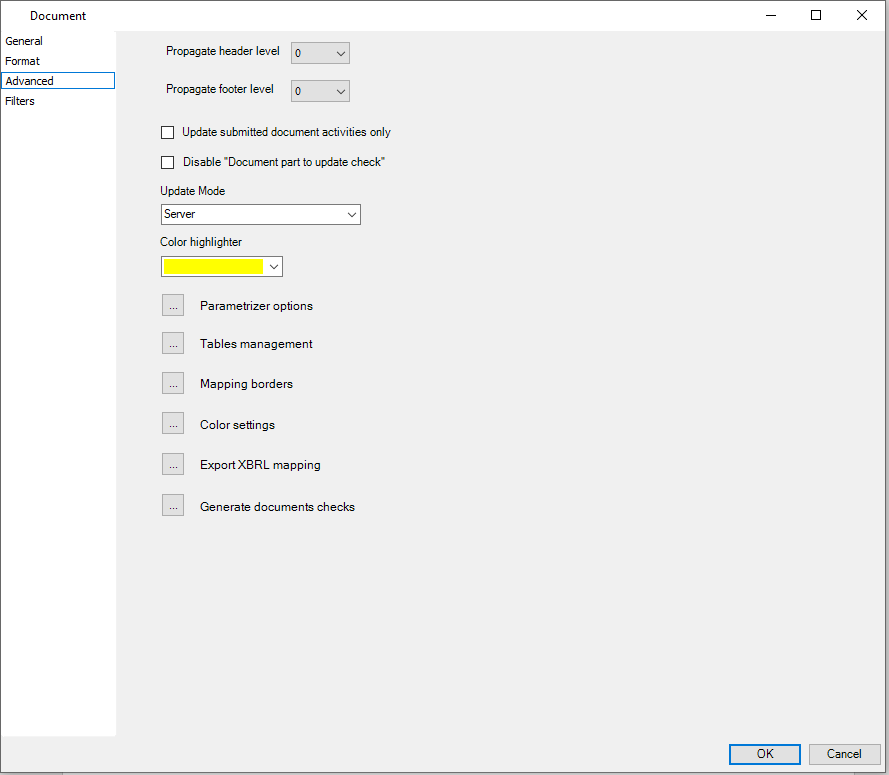
- Propagate header level / Propagate footer level (only for Word client): these two fields specify the level from which the header and the footer must be retrieved:
- if the value is 0, then the header and the footer are retrieved from the Master document
- if the value is 1, 2, 3, etc..., the header and the footer are retrieved respectively from level 1, 2, 3, etc...
- if the value is -1, then the header and the footer are retrieved from the last level of the document
- Update only submitted document activities: if enabled, when updating a node, the system updates only the submitted lower level document activities. This allows improving the update performance when you want to have a look at the document overlooking what is still in progress
-
Disable "Document part to update check": if enabled, the system does not check the document parts that need to be updated after any modification made by the user
-
Update mode: by this option you can choose the document update engine when it is run from Word client. Moreover, only for image type objects from form, it allows you to select the "rendering" process, namely the image generation process. In detail:
- Server (default value)in this case, the update of all objects and the rendering of the image type objects are run by the server engine. When this is set up, in case of "Recursive update" or with "Options", when the user runs the update via Word add-in, the system closes the current document and automatically saves it once the update is complete
- Client, images rendered by Serverin this case, the update of all objects, except the objects "From attachment", is run by the Excel client engine and the rendering of the image type objects from form is run by the server
- Client, images rendered by Excelin this case, the update of all objects, except the objects "From attachment", is run by the Excel client engine and the rendering of the image type objects from form is run by the client engine
For more details regarding the choice of update engine, such as understanding what features are supported or the limitations of each option, see the section Update with options
-
Copy document: keep the states of the workflow:if this option is enabled, when running a copy from document (Copy fromutility) , the states of the workflows of the source document are kept in the target document (available only in case of Copy from)
-
Color highlighter: allows choosing the colour of the objects' highlighter (see "Highlight objects" utility)
- Parametrizer options: allows enabling some specific attributes for the user with parameterizer rights:
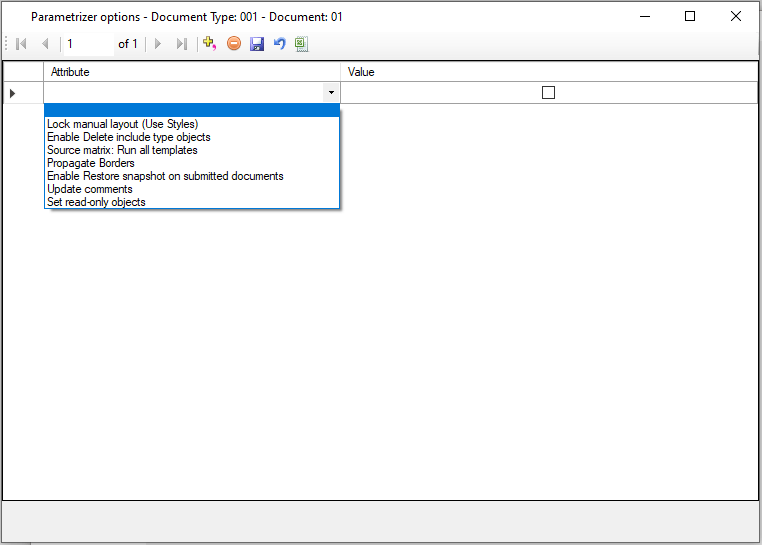
- Lock manual layout (Use Styles): prevents the modification of the Word styles defined by the non-admin users (the General area of the document's properties is in read only mode and cannot be edited)
- Enable Delete include type objects: deletes the objects of "Include" type (in the master document they represent the lower level document parts). To enable the deletion of Include type objects it is necessary to shut and reopen the document.
- Source matrix: Run all templates: when updating a object of matrix type, this option allows running all templates defined in the form
- Propagate Borders: during the consolidation phase, it propagates the borders of Word defined in a sub-part (include) also in the parent document
- Enable Restore snapshot on submitted documents: restores the snapshot even if the related document activity is submitted
- Update comments:updates any comments inserted by the user
- Set read-only objects: this option allows specifying for each object of the document if it belongs to the administrator or not (see “Lock object” objects property)
- Tables management: allows enabling some options that apply to the objects of cell and table type (from attachment or matrix) inserted in the document:
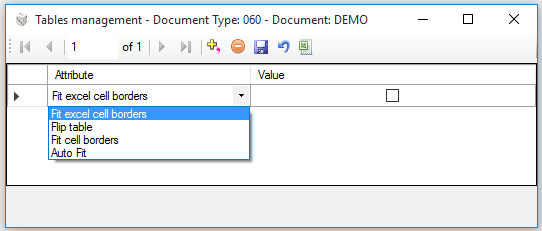
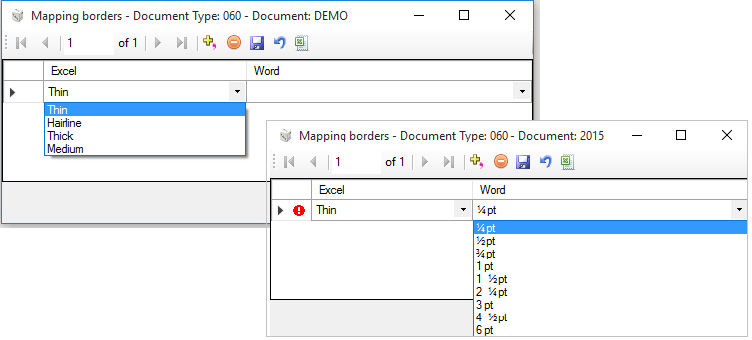
- Fit excel cell borders: if enabled, this option allows resizing the width of the Excel cell to an average value. The conversion of a cell's borders from Excel to Word follows the rules shown below:
| Excel border | Word border |
| Thin | 1 pt |
| Average | 2 pt and ¼ pt |
| Large | 3 pt |
- Flip table: if enabled, this option enables the insertion into the document of the table objects with text from right to left (in support of users from country using the right to left scripts)
- Fit cell borders: if enabled, this option removes the space between the content of the Excel cell and its margins
- Auto fit: if enabled, this option allows adapting automatically the tables' size to the size of the Word page into which the object is being inserted
The enabled options apply when inserting a new objects and not when updating an existing one.
- Mapping borders:: allows choosing the border type of a Word table when it is imported as a table object (from attachment or from matrix). In this window it is possible to set the size of the Excel tables' borders and the corresponding size for the Word tables.
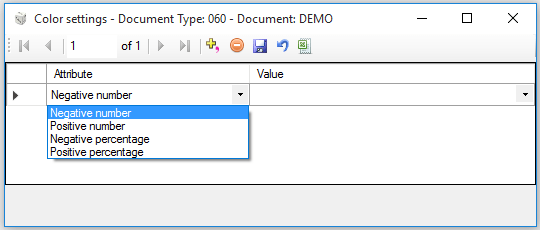
- Color settings: allows choosing the colour of specific values (Negative number, Positive number, etc) on the Word document.
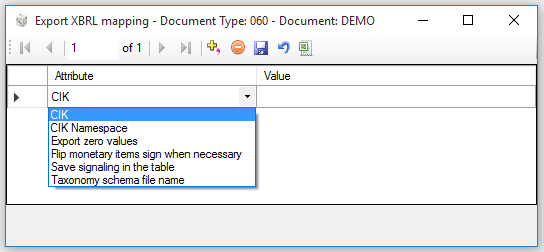
- Export XBRL mapping (only for Word client): allows setting some options (CIK, CIK Namespace, etc) required for the XBRL filing.
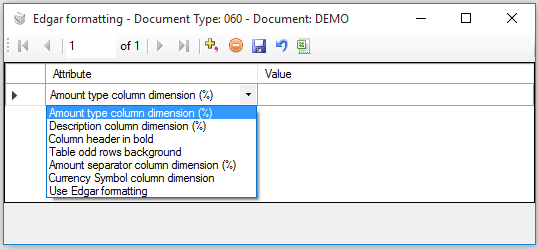
- Edgar formatting (only for Word client): allows defining the formatting criteria for the creation of a document to "edgarize".
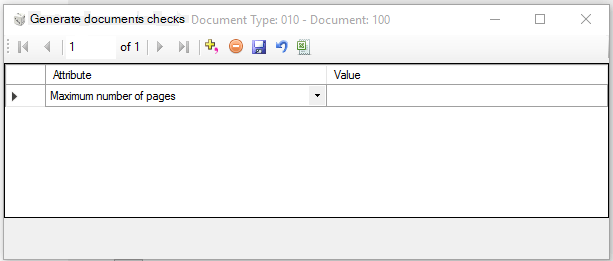
- Generate documents checks (available only for Word client when the "Report Bursting" utility is enabled): allows managing the check over the documents generated by the "Report bursting"utility:
- Maximum number of pages: allows choosing the maximum number of pages of the document generated by the "Report bursting" utility (it must be a number greater than 0).
Filters Area
By clicking on the Filters area, it is possible to select the "global filters" on the Tagetik dimensions in addition to the "standard filters" of the document (Entity/Scenario/Period), to use when updating the single objects that read data from Tagetik CPM.
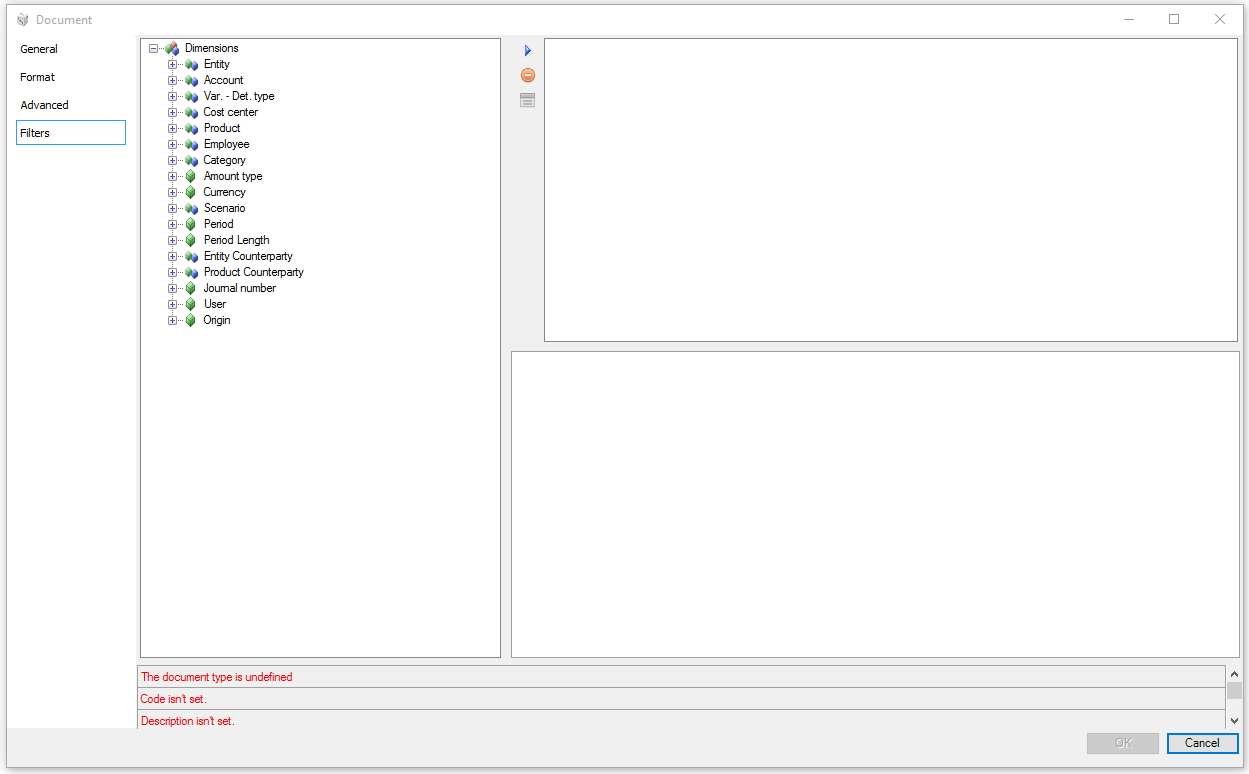
In this area it is possible to redefine the "standard filters" of the document. If these filters are defined both in the
General area and in the Filters area, the value defined in the latter section will overwrite the one defined in the first section.


New document
After creating the document, its structure can be displayed by expanding in the document tree the Master document it belongs to. Below the created document, each document activity is displayed as a single item (as well as the sub-parts, if any Part_I > I_Itme_1 > ecc..)
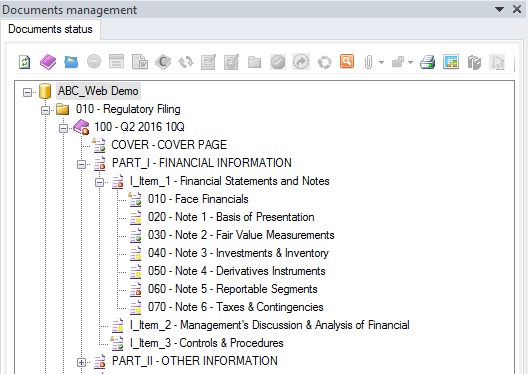
Double-clicking on a document part opens it in the workspace of the Word interface. The opened document part is highlighted in the document tree in a different colour:
- Grey: the user has no rights on that document part
- Black: the user has rights on that document part
- Green: the document part is opened in edit mode
- Blue: the document part is opened in read-only mode
After creating the document, you can modify its settings (except Document type and Code). To modify the settings, select the document in the document tree and then click on the  Document properties button in the toolbar of the Documents area.