Access the SCP Grid View Using the CPM Workflo
Access the SCP Grid View Using the CPM Workflow
Access this task from the Data Entry & Reporting menu. The feature is only available on workflows and processes when dimensions by step is set.
Add the SCP Grid View task into the workflow to navigate through SCP directly from the CPM process.
- Click Edit and select the Data Entry & Reporting tab.
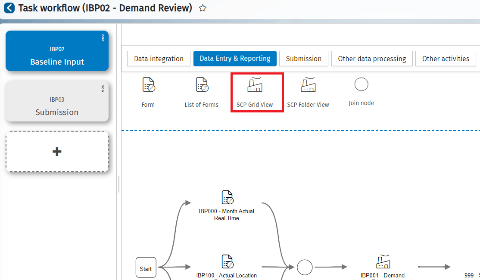 2. Add the SCP Grid View activity to the workflow by dragging and dropping it to the workflow.
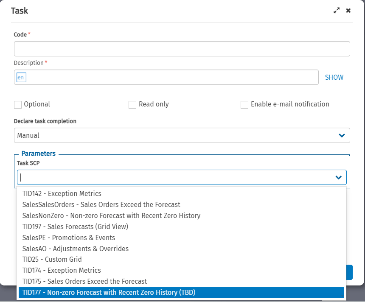
3. Add the Code and Description and select the Task SCP.
2. Add the SCP Grid View activity to the workflow by dragging and dropping it to the workflow.
3. Add the Code and Description and select the Task SCP.
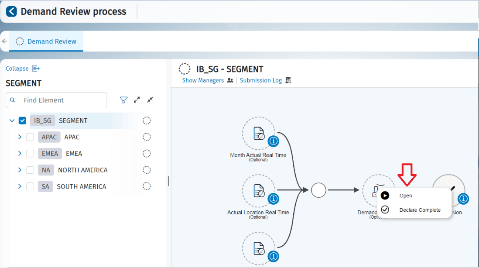
All accessible processes display in the CPM Contribute interface. 4. Click Open Process. 5. Click on the SCP Grid View task tile and click Open.
 6. From the SCP Navigation screen, select the scenario to display.
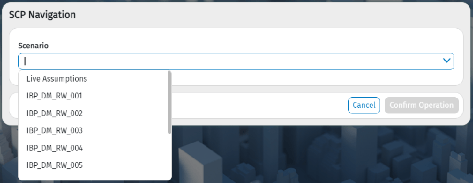 7. Click Confirm Operation. Navigate to the SCP Record View directly from the process.
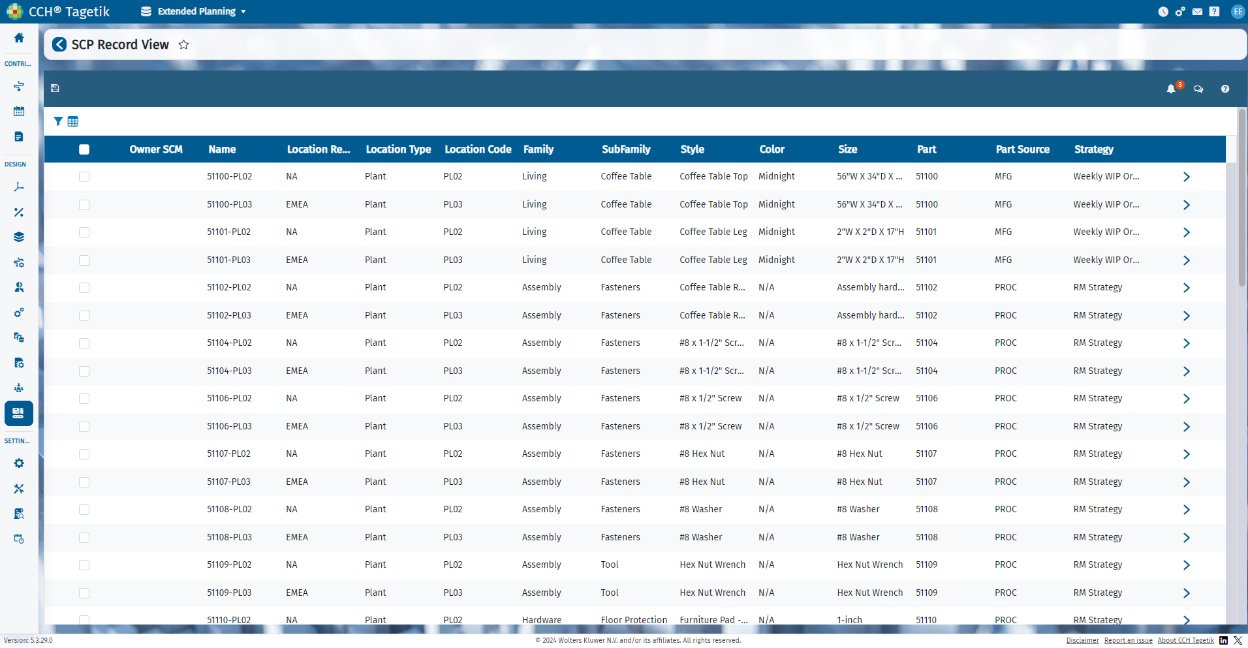
Which SCP task to display is essential. Select from those available for our user group assignments.
Aligning the Grid View with the multidimensional process dimension
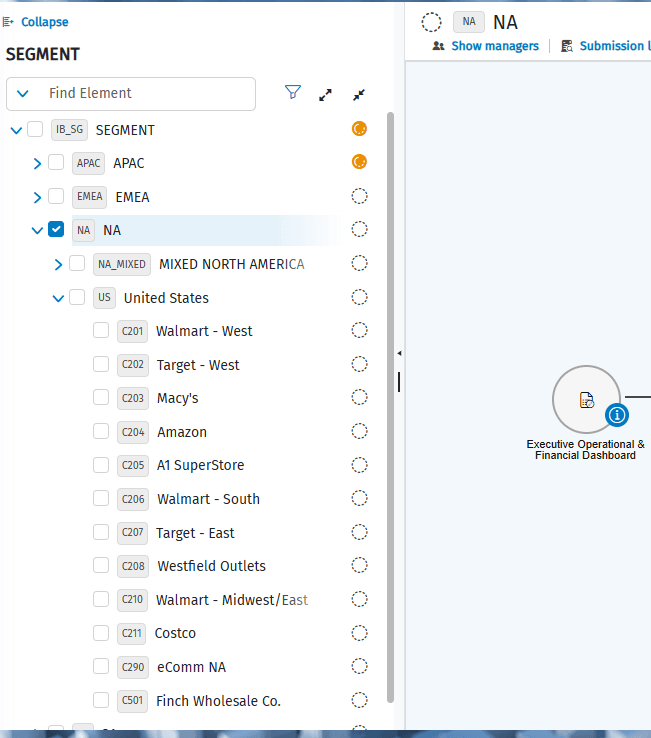
The grid view allows to align the data displayed within the grid view with the selected node of the multidimensional process. For example, if the user selects NA, you can display all rows related to the NA node. This feature also allows to leverage user restrictions for grid views, as users will be limited to only those elements to which they are granted user rights.
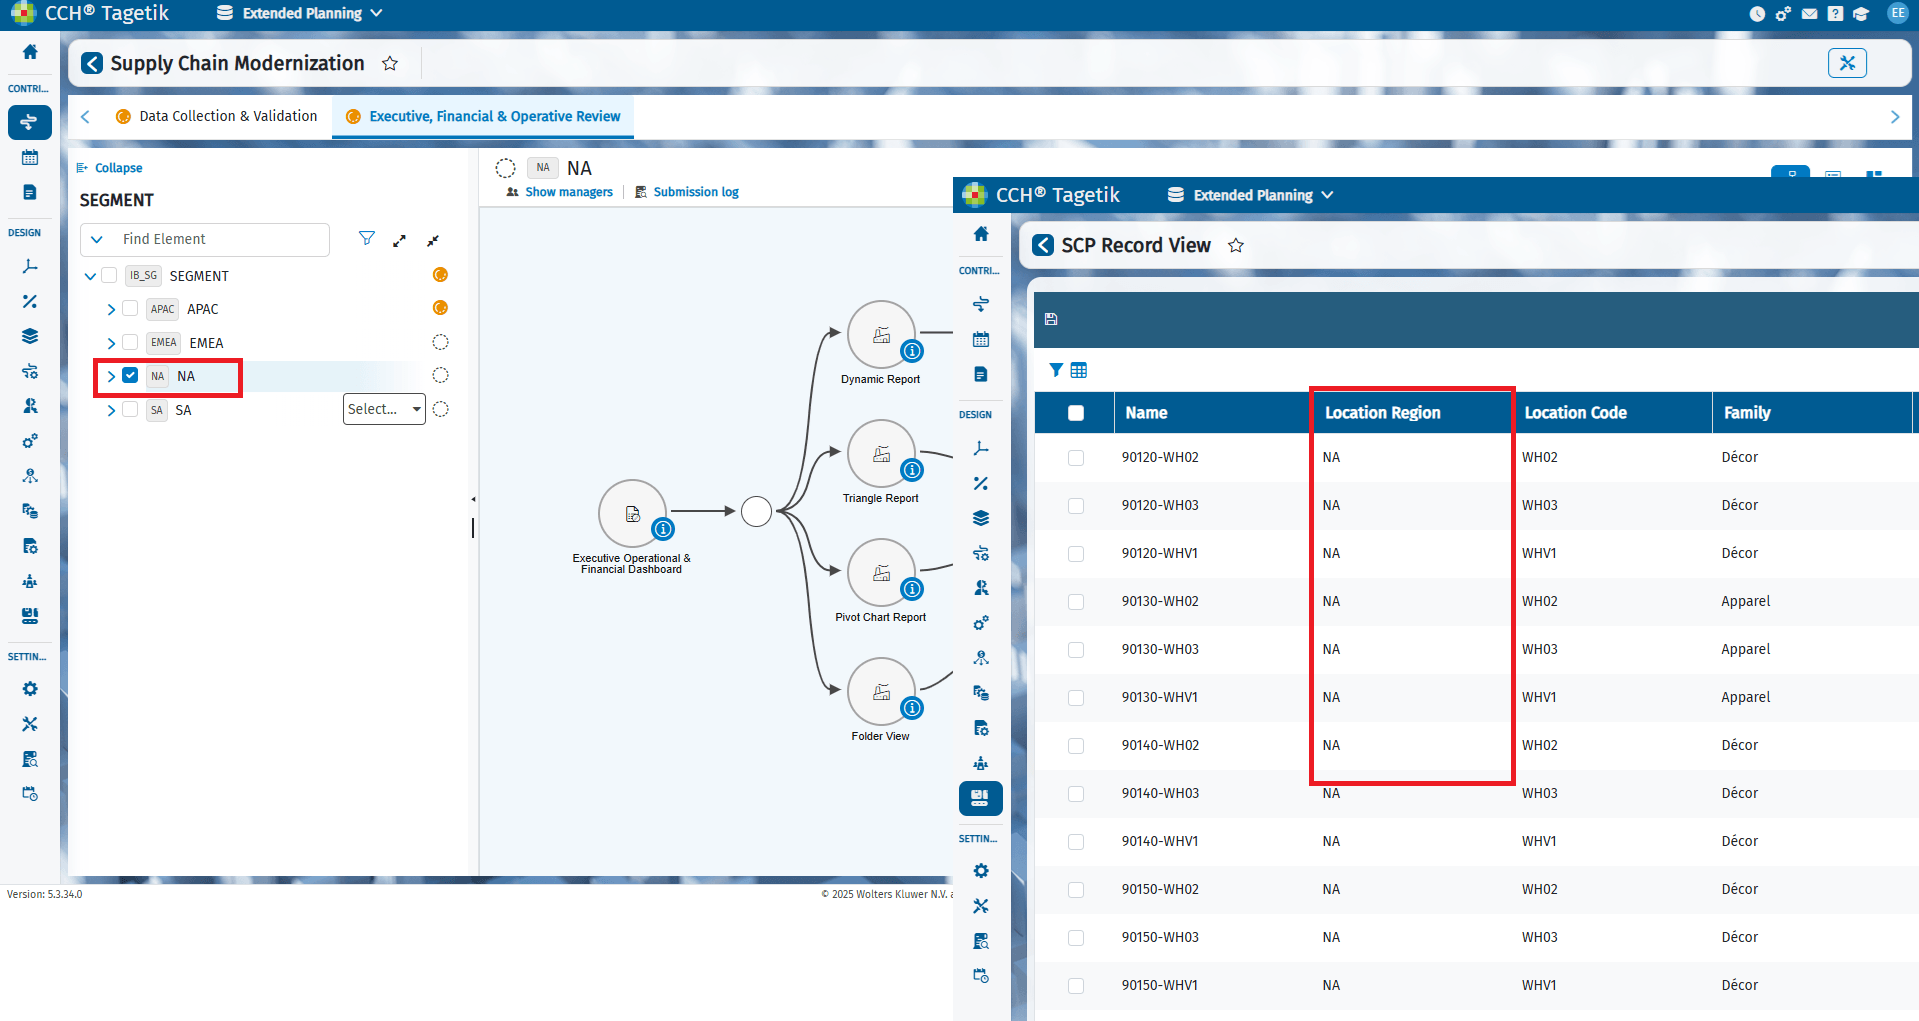
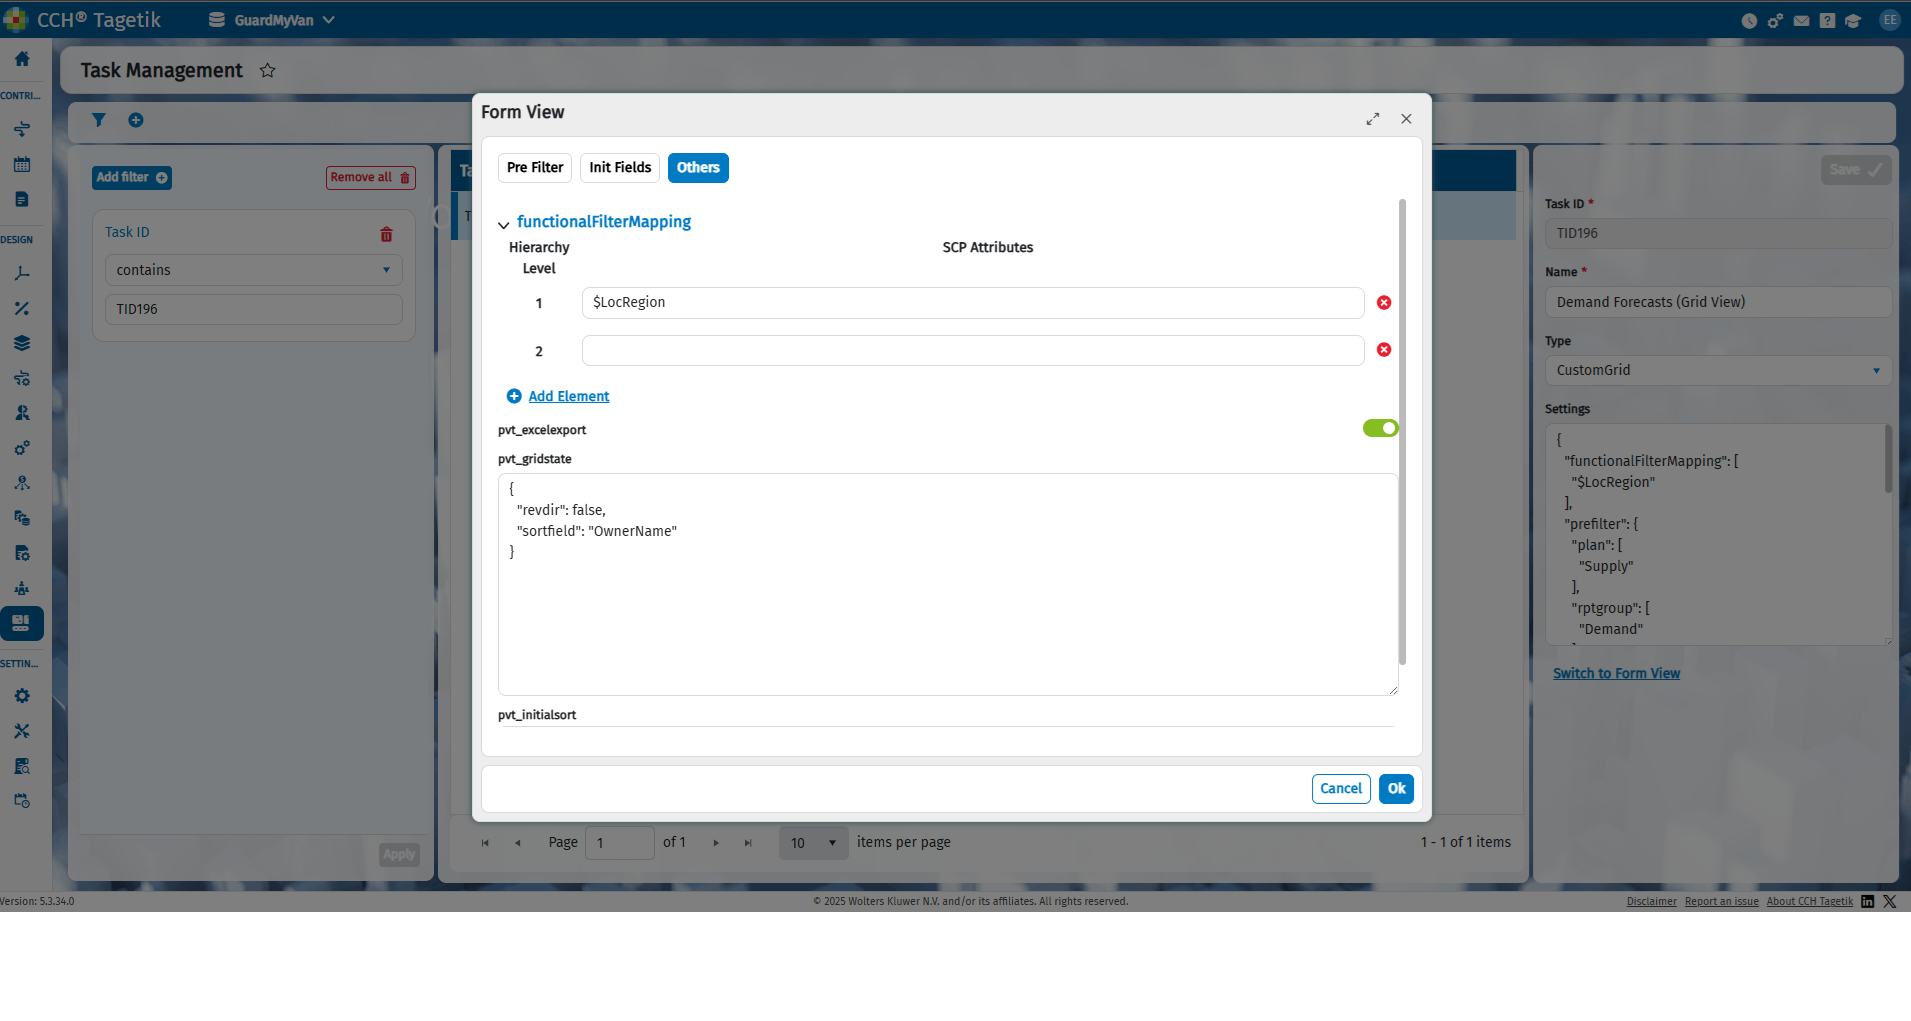
Task Manager settings allows and guides the alignment across Grid View and Process. For each grid view you wish to filter, the hierarchy field to be filtered must be defined in association with the node. To do this, go to Design > Supply Chain Planning > Task Manager and select the grid view code to align with the process. Within the Task Management settings, there is a tab called "Others" with the "Functional Filter Mapping" component. The "Functional Filter Mapping" contains a list of hierarchy levels and the SCP Attribute field. For each hierarchy level, you can define which Supply Chain Planning record attribute should be considered in the hierarchical tree filter.
Detailing the previous example in more detail, the hierarchy is composed of the following levels:
- Level 0, not included in the filter, is considered the parent node of all sub-nodes. If the record view is launched from this node, all records contained in the grid view are displayed. For example, SEGMENT
- Level 1, all child nodes of the Level 0 node. For example, APAC, EMEA, NA
- Level 2, all child nodes of Level 1 nodes. For example, United States, Mixed North America
- Level 3, all child nodes of Level 2 nodes. For example, Walmart West, Target West, etc.
Levels can be added using the "Add Element" button and must be aligned with the hierarchy you want to align with the grid view. Each level of the hierarchy must be assigned only one "SCP Attribute" element, which is the unique attribute code of the SCP record. These codes can be found in the Design > Supply Chain Planning > System Setup menu.
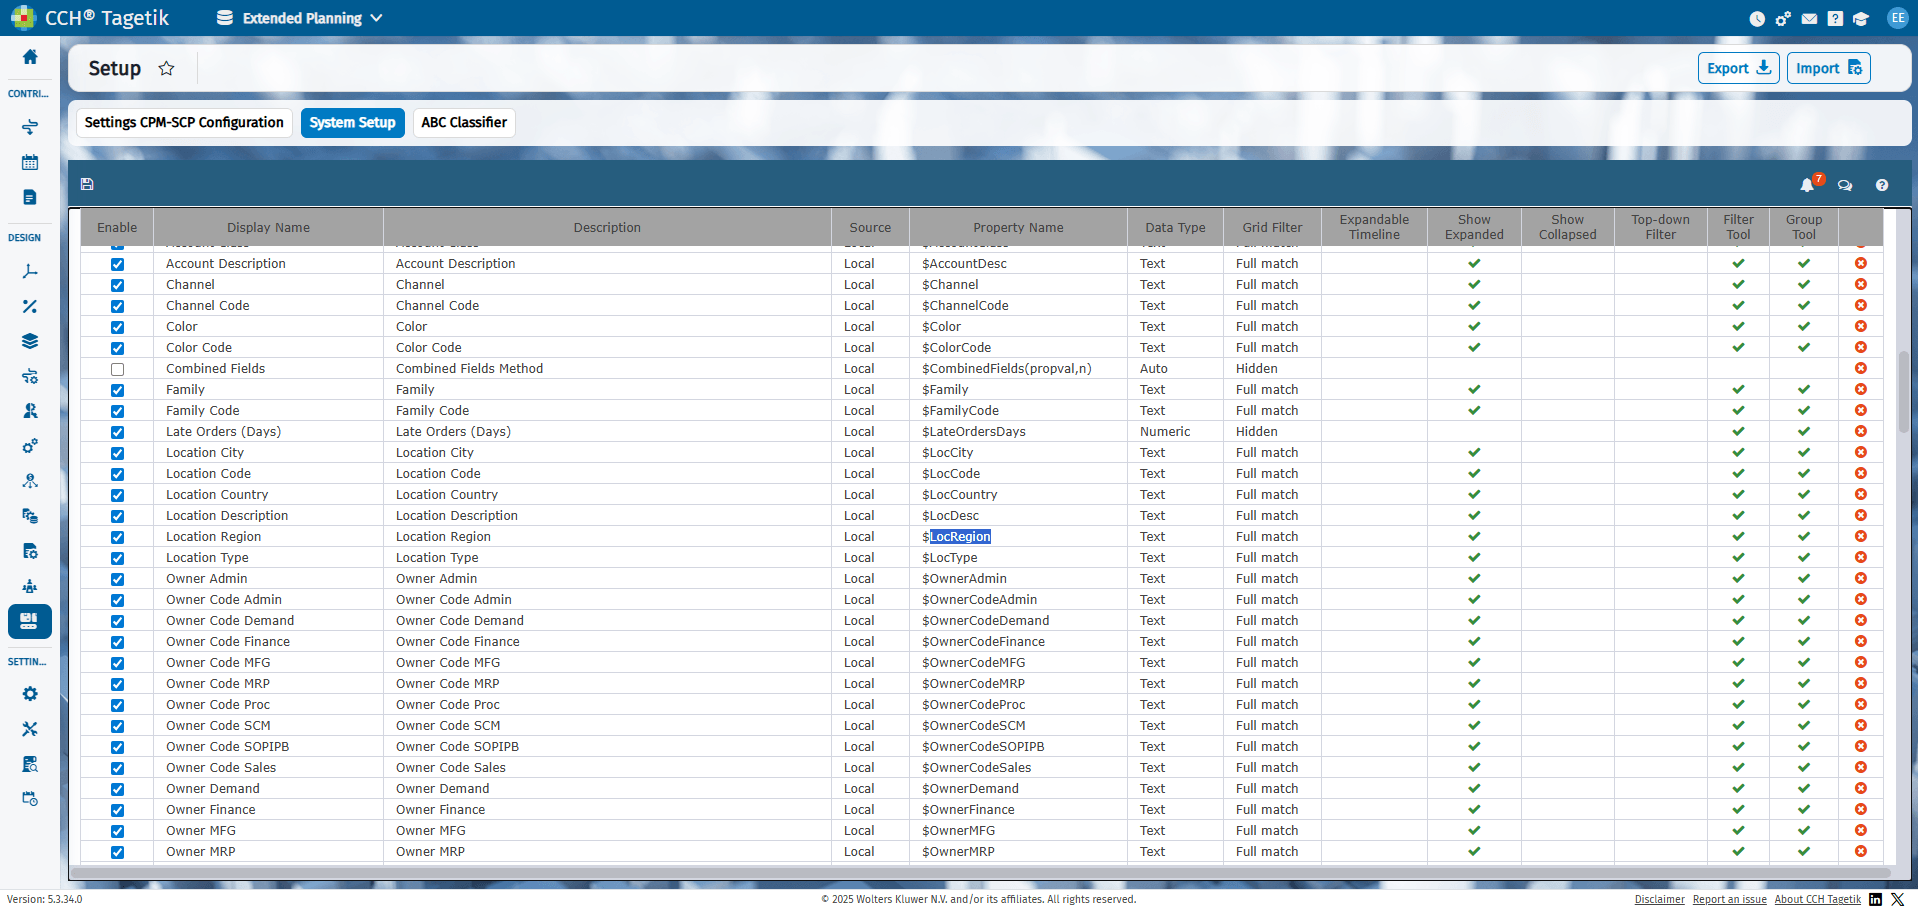
Following the example, associating the "SCP Attribute" with the "$LocRegion" code at Level 1 means that the grid view field referring to "$LocRegion" will be filtered based on the selected node. Therefore, selecting the "NA" node will display all records with the "$LocRegion" field set to "NA," excluding all other records.
The same principle applies if more than one level is set. For example, if "$LocRegion" is selected as the filter at Level 1 and "$State" at Level 2, when the "United States" node is selected, all records with the "$LocRegion" field set to "NA" and the "$State" field set to "United States" will be displayed, excluding all other records.
The number of filters to apply varies depending on the hierarchy and use case.
Visualization filtering persistency of Record Grid
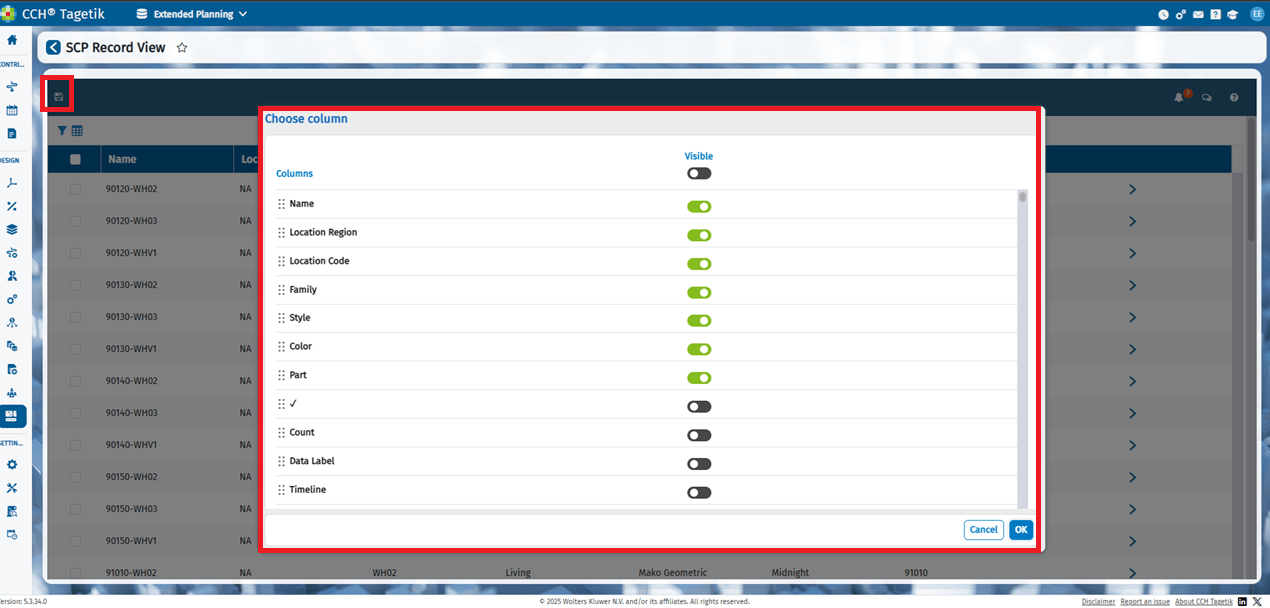
The Grid View's display of columns and their order can be customized by the individual user. To do so, the user must select the columns to display and their order from the appropriate menu and then save the view. The saved setting will be displayed the next time the user accesses the Grid View.