Supply Chain Planning Task Management
The Task Manager page has the main purpose of allowing the Add, Edit, and Delete of Supply Chain Planing task for CollaborativeWorkflow. The technical construction of the tasks follows the standard characteristics of the CCH Tagetik Supply Chain Planning module and are not the subject of the following manual. The manual is intended to explain how to access the functionality from the new interface. Below is a detailed comparison between the mapping of the classic interface and the new interface.
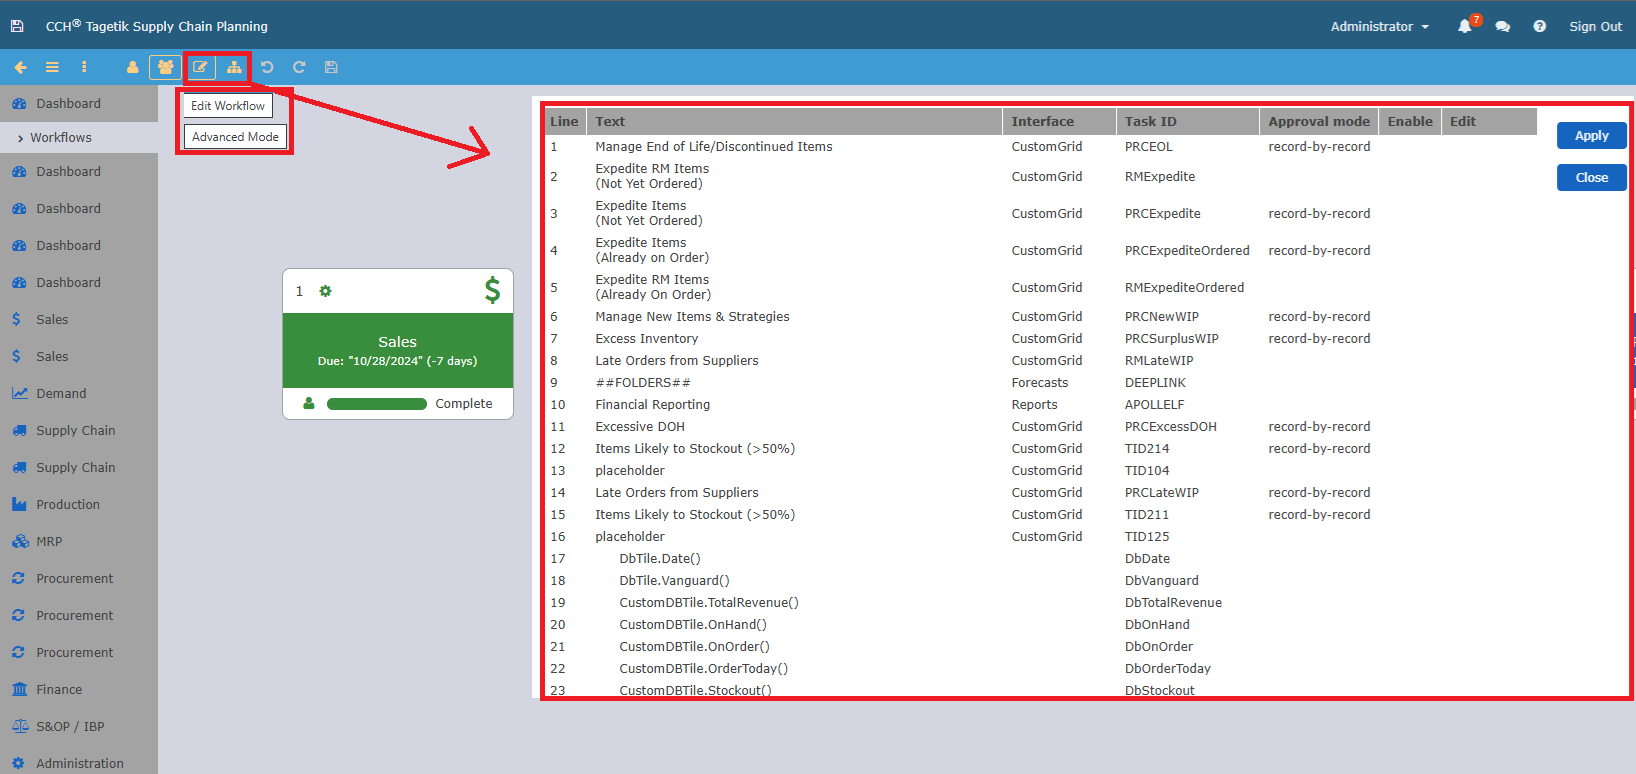
The Supply Chain Planning classic interface gives the possibility to configure the solution through the path Edit Workflow -> Advanced Mode. In which you can do:
- Create, Edit, Delete Task
- Edit Task Name, in which a double interface is available, dscript and User Friendly.
In the interface you can edit and save tasks. Also add a new step to the task via Add Step. For more details you need to consult the manual dedicated to the CCH Tagetik Supply Chain Planning solution.
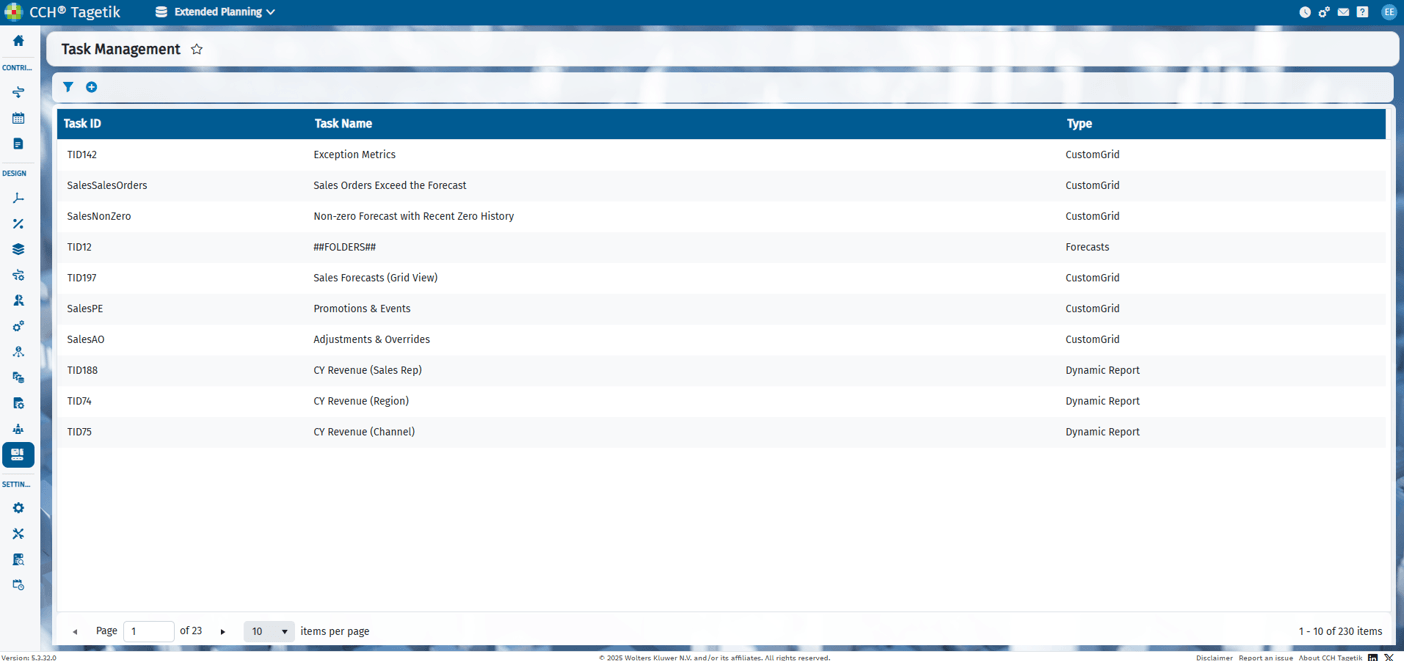
The configuration task features of the CCH Tagetik Supply Chain Planning solution can be reached via the path Design -> Supply Chain Planning -> Task Management in the new interface. The new interface required a change in the naming to be aligned with those of the other CCH Tagetik modules. This means that "Edit Workflow/Advance Mode" are renamed "Task Management", because the workflow is feature managed by a dedicated are within CCH Tagetik Platform
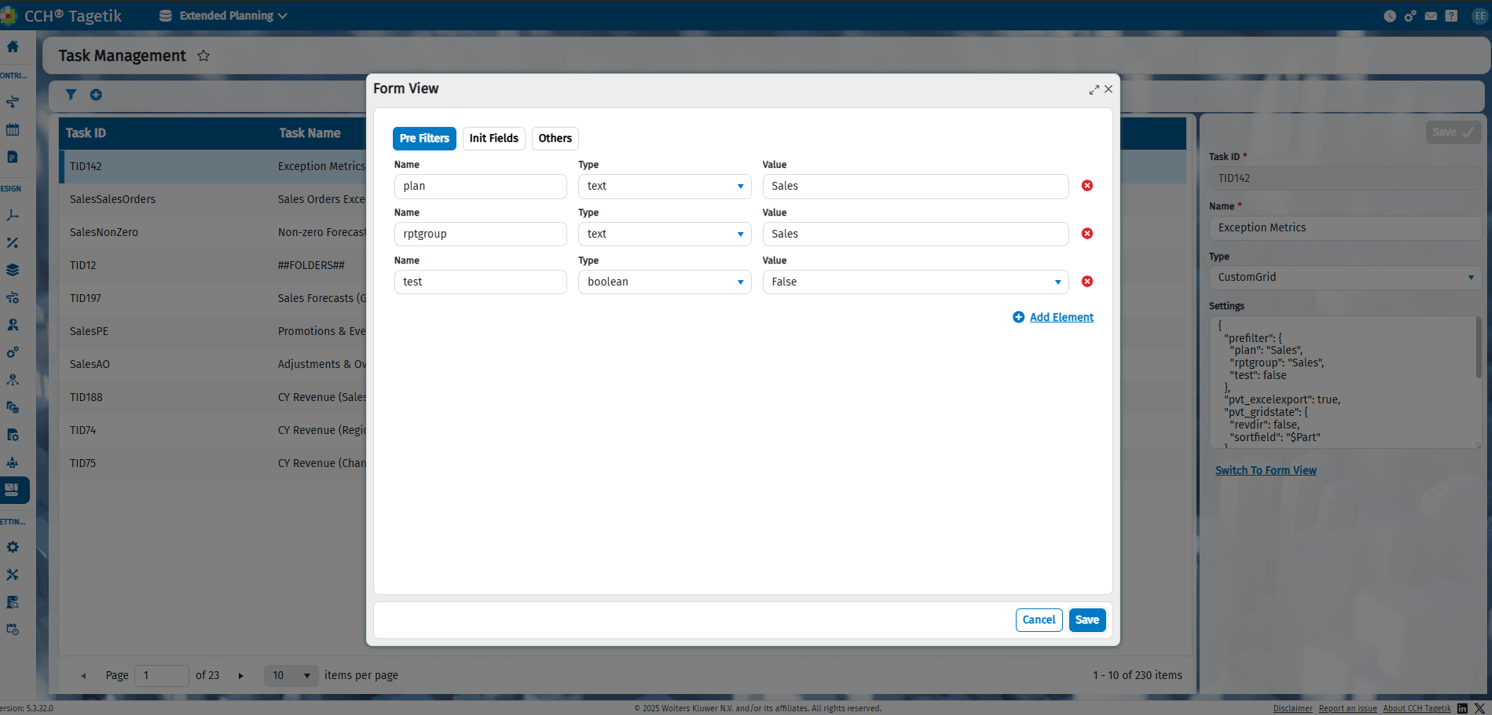
By selecting a single row and clicking on Switch to form view you can access the configuration modification of individual Task:
- Form View: allows you to configure individual operations via a user-friendly interface. In which, based on the type of task, you can change the configuration using drop-down menus and toolbars and adding/removing elements via buttons. This allows you to use a no-code logic in modifying individual operations.
- Script View: allows you to directly modify the code underlying individual operations for more complex configurations.
It is possible to switch between the two configuration modes using the dedicated button. Once the changes are complete, it is necessary to save the new configuration for it to be applied to the module.