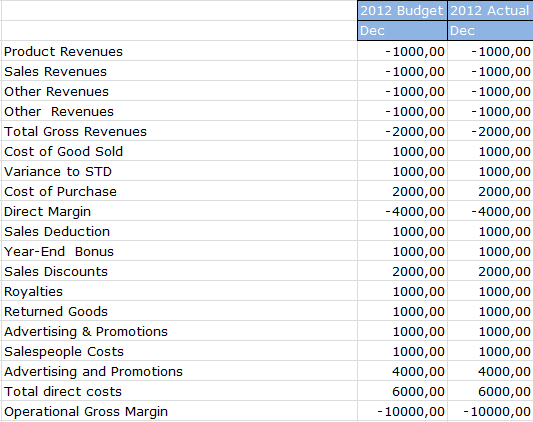
Example of the definition of style sheets
Defined styles
Suppose you want to define three different styles: one for the font to be used within the matrix, one for the numbers and one for the column headers.
 It is advisable to create one style for every attribute, i.e. one for alignment and one for borders, instead of creating one style containing both definitions. This allows you to design the layout with greater flexibility, applying various combinations of styles.
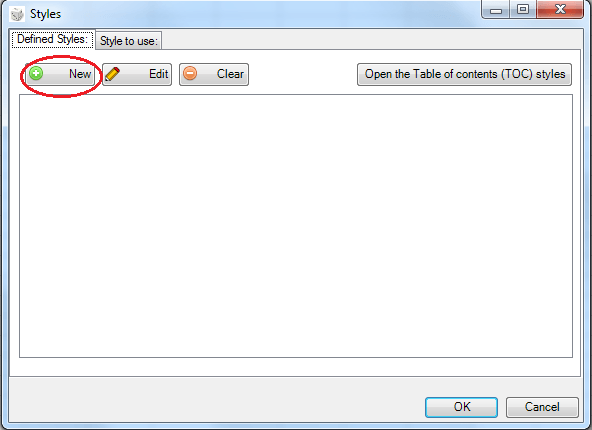
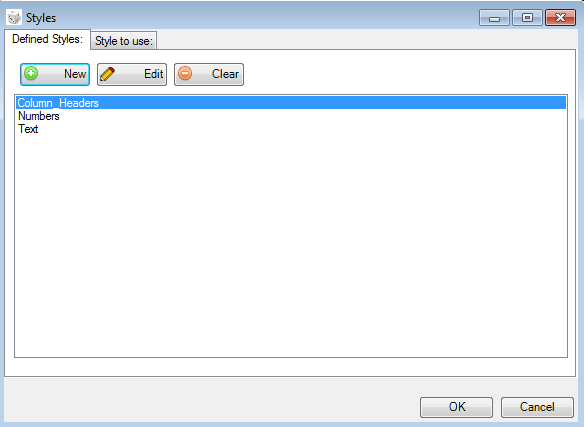
To create a new style, click the New button in the definition window.
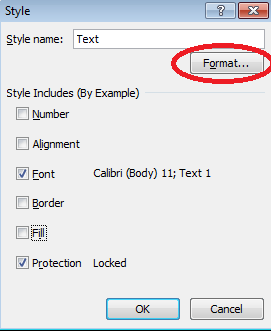
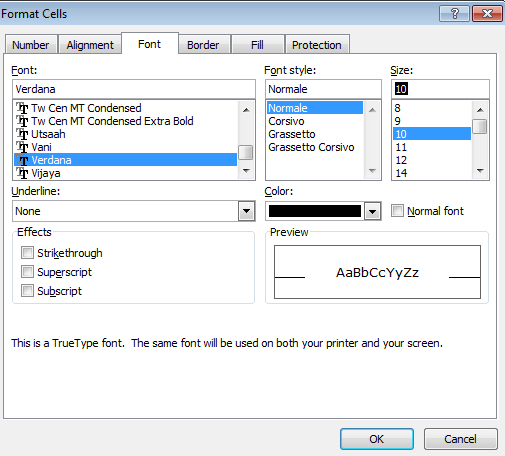
When the "New" button is clicked, the system will open a window in which a name must be assigned to the style being defined, e.g. Text, and the type of style to be applied must be selected. In this case, we have selected "Font" because we want to define the type of font to be used for the data displayed in the matrix. The format of the font can be changed by clicking on the Format button.
 Web form 2.0 treats the options in the form below as if they were always selected. Consequently, if one of these options is not selected in Excel (e.g. the Fill flag), but one of the related settings has been previously customised (such as background colour or font), that setting will still be applied.
Now let’s see how to create the second style to be applied to header columns in our matrix. Suppose you want the header columns to have a blue background, with white text aligned to the centre, and a black border. In this case, we will have to activate the Alignment, Border, Fill options and set the desired format for each of them
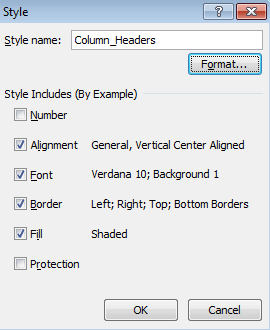
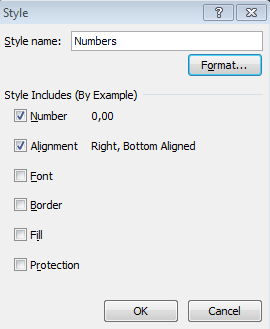
The last style to be defined is the one to apply to numbers. Suppose you want the numbers aligned to the right, with two decimal figures. In this case, we will need to activate the Number and Alignment options and set the desired format for each of them.
At this point, our style sheet contains three different styles. Any changes can be made using the Edit button.
Style to use
Now let’s see how to associated the three styles defined in the previous example – Column_Headers, Numbers andText – to the various sections of the matrix.
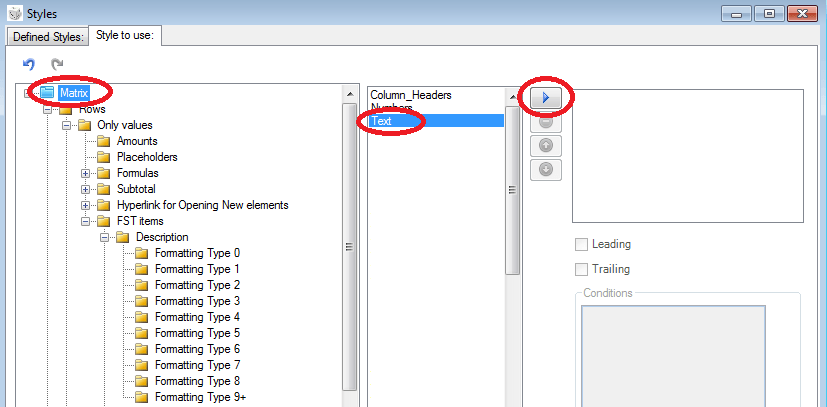
The Text style, which sets the font to be used for the entire matrix, must be associated with level 1 of the tree. Then the steps to take are:
- in section (1) select level 1 "Matrix" of the tree;
- in section (2) select the Text style
- click the button

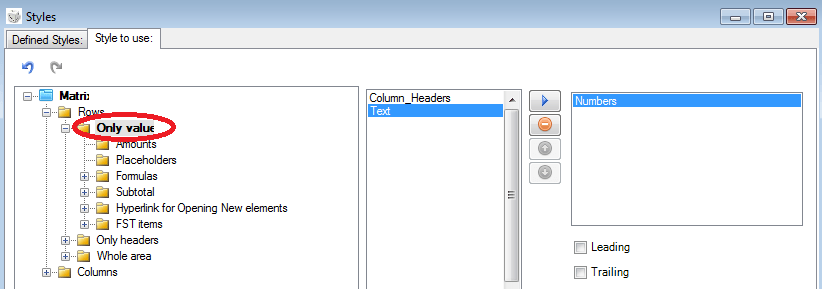
The Numbers style must be assigned to all areas of the matrix in which numbers are shown or to the Rows / Only values section. Then the steps to take are:
- in section (1) select level 3 "Matrix/Rows/Only values" of the tree;
- in section (2) select the Numbers style
- click the button
The Column_Headers style must be assigned to all column headers or to the Columns / Only headers section. Then the steps to take are:
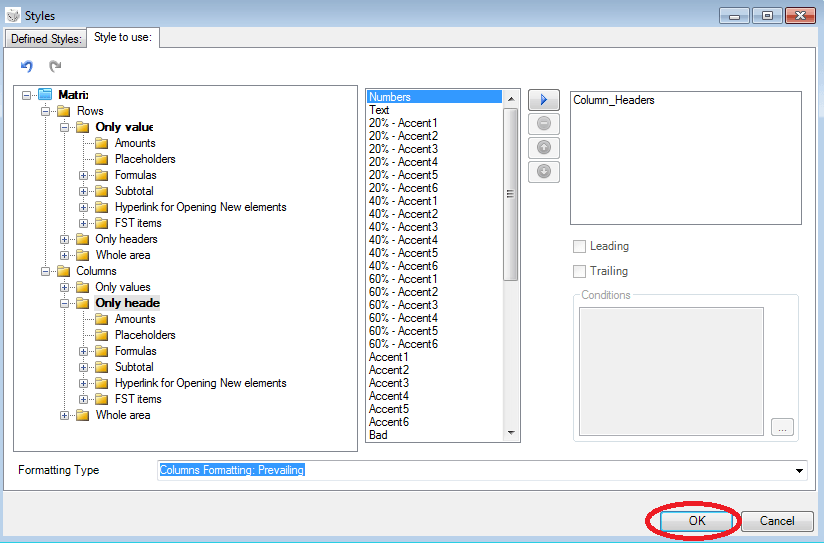
- in section (1) select level 3 "Matrix/Columns/Only headers" of the tree;
- in section (2) select the Column_Headers style
- click the button
The system shows the matrix sections for which a style has been defined are shown in bold
At this point, when the OK button is clicked, our new style sheet will be ready to be used
The results of applying the style sheet defined in the previous example are shown below. Matrix formatting can be further modified by fine-tuning our style sheet; for example, by adding formatting for row headers, borders and a different font/colour for subtotals and formulas.