Forecast Model
The Forecast Models (Data processing > Copy data) are used to fill a forecast scenario from the combination of actual data and other forecast data (e.g. Budget).
A Standard Forecast Model consists of a header and a set of rules; the actual months of the selected Forecast scenario are filled by copying data from the actual scenario, whereas the forecast months are calculated according to the model defined for each single rule.
A Custom Forecast Model is defined through a customizable MD syntax. Therefore, it is possible to customize the syntax automatically generated by the system from the configuration of a Standard Model.
This simplifies the writing of the syntax that, in this way, is not made from scratch.
To simplify the writing of the syntax, it is possible to customize the syntax automatically generated by the system from the configuration of a Standard Model.
The Forecast scenario, and the source scenarios for the actual and forecast data, are selected when running the model.
Create Forecast data through a Forecast Model
The Forecast Model can be run from the process cockpit, “Detail summary” tab, by clicking the “Data operations” button in the “Actions” panel.
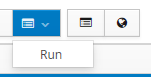
When selecting “Forecast Models”, the system displays the list of all Forecast Models defined: select one of the models and then click "Run" in the top menu.
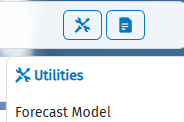
The Forecast Model can be accessible also from multidimensional process via "Utilities" within the top bar of the process
The following parameters must be set up:
Output Section.
- Forecast Scenario . This is mandatory and defines the target Scenario. It is possible to select only an Original and active Scenario, fully belonging to the current process.
-
Run also on following scenarios. When this is selected, the operation is run also on the following scenarios linked to the selected one.
-
1° Forecast Period. This is mandatory and defines the first forecast period of the Forecast Scenario. The periods prior to the selected one are filled with the data of the Actual Scenario, whereas the following Periods are filled with the data generated by the Model. The system automatically suggests the first unlocked Period of the Forecast Scenario.
Note. It is not possible to select the first Period of the Forecast Scenario.
- Forecast Category. This is optional and defines the Category on which Forecast data is to be written. It is possible to select only one category of Amount type belonging to the process or to specify no category at all. If a Category is selected, the input data is aggregated considering all selected input categories, whatever their type; the result is written to the selected category, leaving out the detail of all input categories. If no category is selected, only the detail of the Amount categories is kept; any data on adjustment categories included in the selected node in input are not taken into account.
-
 However, it is possible to change this behaviour by defining a custom model. See: Forecast Model
 -
Delete All. Unselected by default. In this case, before running, the system deletes only any data generated by a previous execution of any Forecast Model, run with the same filter. If selected, the system deletes all data for the selected filters whatever the origin.
Input section.
- Actual Scenario . This is mandatory and defines the source Scenario. It is possible to select only an Original and active Scenario. If not yet defined, when selecting the Budget Scenario, it is automatically filled with the Scenario following the Scenario prior to the Forecast Scenario. Indeed, usually this configuration identifies the Scenario containing the actual data of the same year as the Forecast Scenario.
 Example:
Forecast Scenario: 2019FCT
Previous Scenario of 2019FCT: 2018ACT
Following Scenario of 2018ACT: 2019ACT
-
Category node. Specifies any filters on the Category to be applied when reading Actual data. Only one grouping can be specified, all category types are taken into account (e.g. amounts, Entity journals, consolidation journals).
-
Category node. It specifies the Category filters to apply when reading the Actual data. Only a grouping can be specified.
-
Budget Scenario. This is mandatory and defines the source scenario of the budget data. Only an original and active Scenario can be selected.
Delete data before running
When running a forecast model, data are deleted based on whether or not the "Delete all" flag is selected; if it is flagged, data is deleted by origin, otherwise it is not. Two different approaches are used according to the Forecast model that is being deleted:
-
Non-custom MD Script: the deletion is carried out based on the forecast model's rules.
-
Custom MD Script: the deletion is carried out using the data deletion used by the MD calculation engine.
Definition of a Standard Forecast Model
A Forecast Model can be defined only if the user has admin rights.
Header
The header of a Forecast Model is defined by the following properties:
- Code. Mandatory, unique identifier of the model.
- Description. Mandatory.
- Step. This is mandatory and identifies the step with which the Forecast scenario must be defined: if 1 is specified, then the data is written on all periods. Otherwise, it is written every n Periods, where n is the selected value, by moving back from the last period of the selected Forecast Scenario.
Aggregation Policy Section.
- Aggregate by Account. This allows you to specify a hierarchy of the Account dimension. If specified, the data are aggregated on the parent node of the selected hierarchy to which each element is related. The result on the selected Forecast scenario is saved on the reference lowest elements of the node.
- Aggregate by Entity. It allows you to specify a hierarchy of the Entity dimension. If specified, the data are aggregated on the parent node of the selected hierarchy to which each element is related. The result on the selected Forecast scenario is saved on the reference lowest elements of the node.
Rules
The rule of a Forecast model, is defined by the following properties:
- Sequence. This is mandatory, is the unique identifier of the rule and represents the execution order of the rules.
- Description. Mandatory.
- Markup. It defines the percentage of Budget data to consider in the calculation of Forecast data. By default, it is set to 100%.
-
Model type. Mandatory. While the actual Periods of the Forecast Scenario are always copied from the Actual Scenario, this property specifies the model to apply for the calculation of forecast Periods; the following models are available:
-
Hold the annual total. The variance between the Budget value, read on the last actual period, and the corresponding Actual value can be removed by correcting the budget values of the forecast periods, so that the total cumulated value of the Forecast Scenario is equal to the corresponding value of the Budget Scenario. The correction applied to each forecast Period is calculated proportionally to the periodic values of the Budget Scenario.
-
Hold the to-year. The variance between the Budget value, read from the last actual period, and the corresponding Actual value is kept constant on the forecast periods by copying on them the periodic value from the Budget Scenario. In this way, the total cumulated value of the Forecast scenario deviates to the same extent from the corresponding value of the Budget Scenario.
-
Budget Scenario. If specified, when running the selected rule, the system reads the Budget data from this Scenario, instead of from the one selected at run-time.
-
Account. Mandatory. It specifies the accounts fro which the rule must generate Forecast data. It is possible to specify an account or a node of a non time-dependent hierarchy.
Filters section.
- Entity. It specifies the entity dimension filters to apply when generating the Forecast data. It is possible to specify an entity or a node of a non time-dependent hierarchy.
- Custom Dimension. Specifies the dimension filters to apply when generating the Forecast data. It is possible to specify an element of the dimension or a node of a non time-dependent hierarchy.
Definition of a Custom Forecast Model
When one of the two predefined models does not correspond to the desired Forecast generation logic, it is possible to define a Custom Forecast Model, namely a Forecast model where the generation of forecast data follows a custom logic.
For this purpose, in the definition window of a Forecast Model header, it is necessary to select theShow calculation logic link: a pop-up for the definition of he custom logic will appear; the definition is done using a MD syntax.
A custom Forecast model uses the MD calculation engine of CCH Tagetik to perform the calculation of forecast data, without generating any MD calculation logic.
Although it is possible to use any function of the MD calculation logics, a Custom Forecast model uses some additional parameters that are set up at run-time with the selection made by the user:
//INPUT PARAMETERS SECTION START
bdgScenario : {[bdgScenario]};
actScenario : {[actScenario]};
bdgCategory : {[bdgCategory]};
actCategory : {[actCategory]};
fctCategory : {[fctCategory]};
lastActualPeriod : {1};
maxFctPeriod : {1};
//INPUT PARAMETERS SECTION END
Such parameters can be uses within the calculation logic, like any syntactic substitution, adding “@” before the name of the parameter (e.g. @bdgScenario).
The syntactic substitution relating to the forecast category returns at runtime the code of the selected category in square brackets, or the Filter([$|$]) expression if no output category is selected.
Please, refer to the manual Calculation logics of "Multi-Dimensional Script" type for further details about the syntax.
Though the entire parametrization defined at Forecast Model rules level is not taken into account with the custom models, it is used to pre-fill automatically the calculation logic with an equivalent syntax: this way, you don't have to start from scratch.
The automatically generated syntax shows a set of MD assignments for each rule and, for each of them, it fills each type of account (i.e. Account Type and Nature) identified by the defined filters.
If necessary, it is possible to go back to the automatically generated syntax through the “Restore” button in the MD editor.